5-1-1-2-1 DM WB Asymmetric Tactical Dashboard
Uploaded Tactic
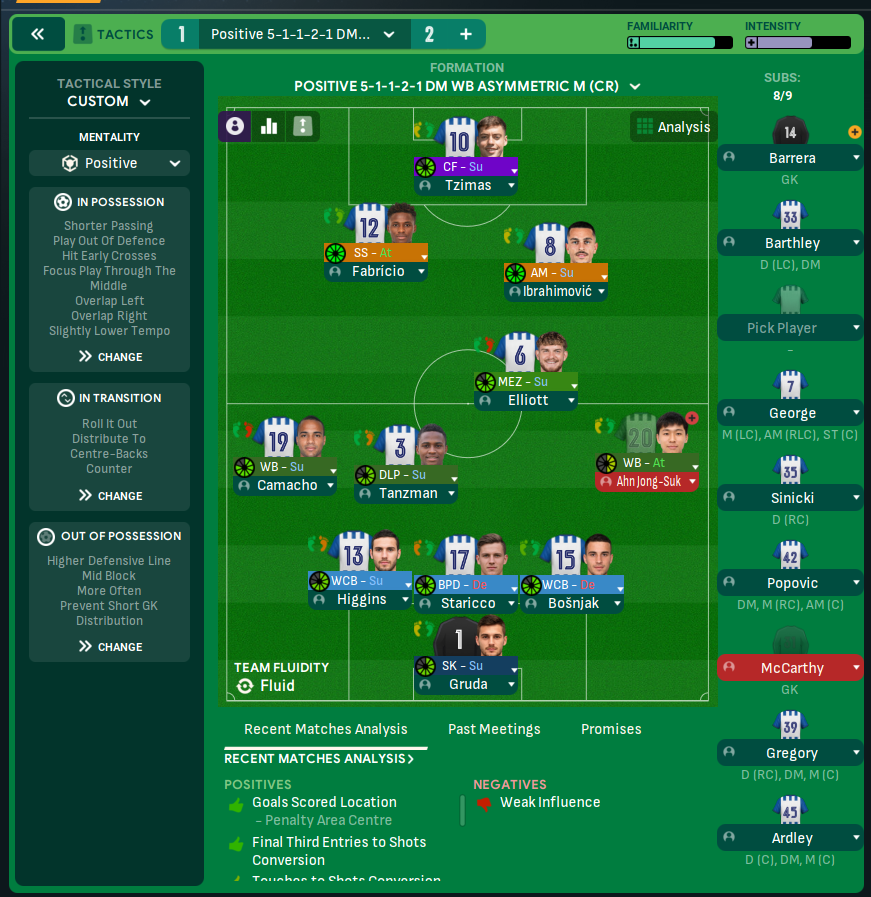
Formation & Style
In Possession
In Transition
Out of Possession
Team Shape Without Ball
No team shape without ball data available
Team Shape With Ball
No team shape with ball data available
Key Strengths
Flexible Attacking Play
The use of a Complete Forward combined with an Attacking Midfielder creates a dynamic attacking front that can adapt to various defensive setups.
Strong Midfield Control
The Deep-Lying Playmaker and Mezzala combination helps maintain possession and dictate the tempo, ensuring the team can transition effectively.
Width from Wing-Backs
Wing-Backs on both flanks offer width and support in attack, enabling overloads and crossing opportunities into the box.
Solid Defensive Structure
The higher defensive line coupled with a mid-block allows the team to press effectively while remaining compact and organized defensively.
Conflicting Directions
Overlapping Play vs. Full Defensive Width
Utilizing overlaps may leave the team vulnerable to counter-attacks if the wing-backs are caught too high up the pitch.
Positive Mentality with Higher Defensive Line
A positive mentality combined with a high defensive line can lead to potential gaps against pacey counter-attacks from opponents.
Mid Block with High Pressure
Having a mid-block may conflict with counter-pressing style, as it can lead to a lack of immediate pressure on losing possession.
Short Passing with Higher Tempo
While shorter passing encourages possession, a higher tempo could disrupt player rhythm, resulting in rushed passes.
Tactical Suggestions
Adjust Defensive Line
Consider lowering the defensive line to reduce vulnerability against fast attackers and adapt to opponent's countering style.
Finetune Tempo to Match Opposition
Adjusting the tempo based on the opponents can help in maintaining possession without sacrificing attacking intent.
Introduce a Dynamic Wing Strategy
Employing one wing-back as a More Advanced Playmaker can create confusion for opposition defenses and offer varied attacking options.
Utilize An Extra Attacking Midfielder
Bringing in an additional attacking midfielder can enhance creativity and goal-scoring threats, especially against defensively rigid opponents.