Counter-Attacking Excellence
Build devastating counter-attacking tactics that turn defensive situations into quick scoring opportunities with precise player roles.
The Art of Counter-Attacking
Counter-attacking football is about patience, discipline, and explosive speed. When executed properly, it's one of the most effective tactical approaches in Football Manager, allowing smaller teams to compete with giants and providing a reliable foundation for consistent results.
The philosophy is simple: absorb pressure, win the ball, and strike quickly before the opposition can reorganise their defence. However, the execution requires careful planning, the right personnel, and perfect timing.
Counter-Attacking Principles
- • Defensive Discipline: Stay organised and compact
- • Ball Winning: Regain possession efficiently
- • Quick Transition: Move from defence to attack rapidly
- • Direct Play: Get ball forward quickly
- • Pace in Attack: Exploit space behind defence
- • Clinical Finishing: Convert limited chances
The Three Phases of Counter-Attacking
Phase 1: Defensive Organisation
The foundation of successful counter-attacking is solid defensive structure that frustrates opponents and wins the ball back.
Defensive Goals
- • Compact defensive lines
- • Narrow defensive width
- • Deep defensive line
- • Limited space between lines
Key Instructions
- • Lower Defensive Line
- • Narrower (width dial)
- • Get Stuck In: optional; leave off if your defenders have low Aggression and rack up cards.
Phase 2: Ball Recovery
Winning the ball back efficiently is crucial - whether through interceptions, tackles, or forcing errors.
Recovery Methods
- • Intelligent positioning
- • Pressing at right moments
- • Forcing opposition mistakes
- • Aerial ball contests
Player Attributes
- • Tackling and Marking
- • Anticipation
- • Positioning
- • Work Rate
Phase 3: Rapid Transition
The moment you win the ball, speed is everything. Quick, direct passes to exploit the space left by committed opponents.
Transition Elements
- • First pass accuracy
- • Player movement off ball
- • Direct passing routes
- • Overloading counter attacks
Essential Attributes
- • Pace and Acceleration
- • Passing and Vision
- • Off the Ball
- • Finishing
Counter-Attacking Formations
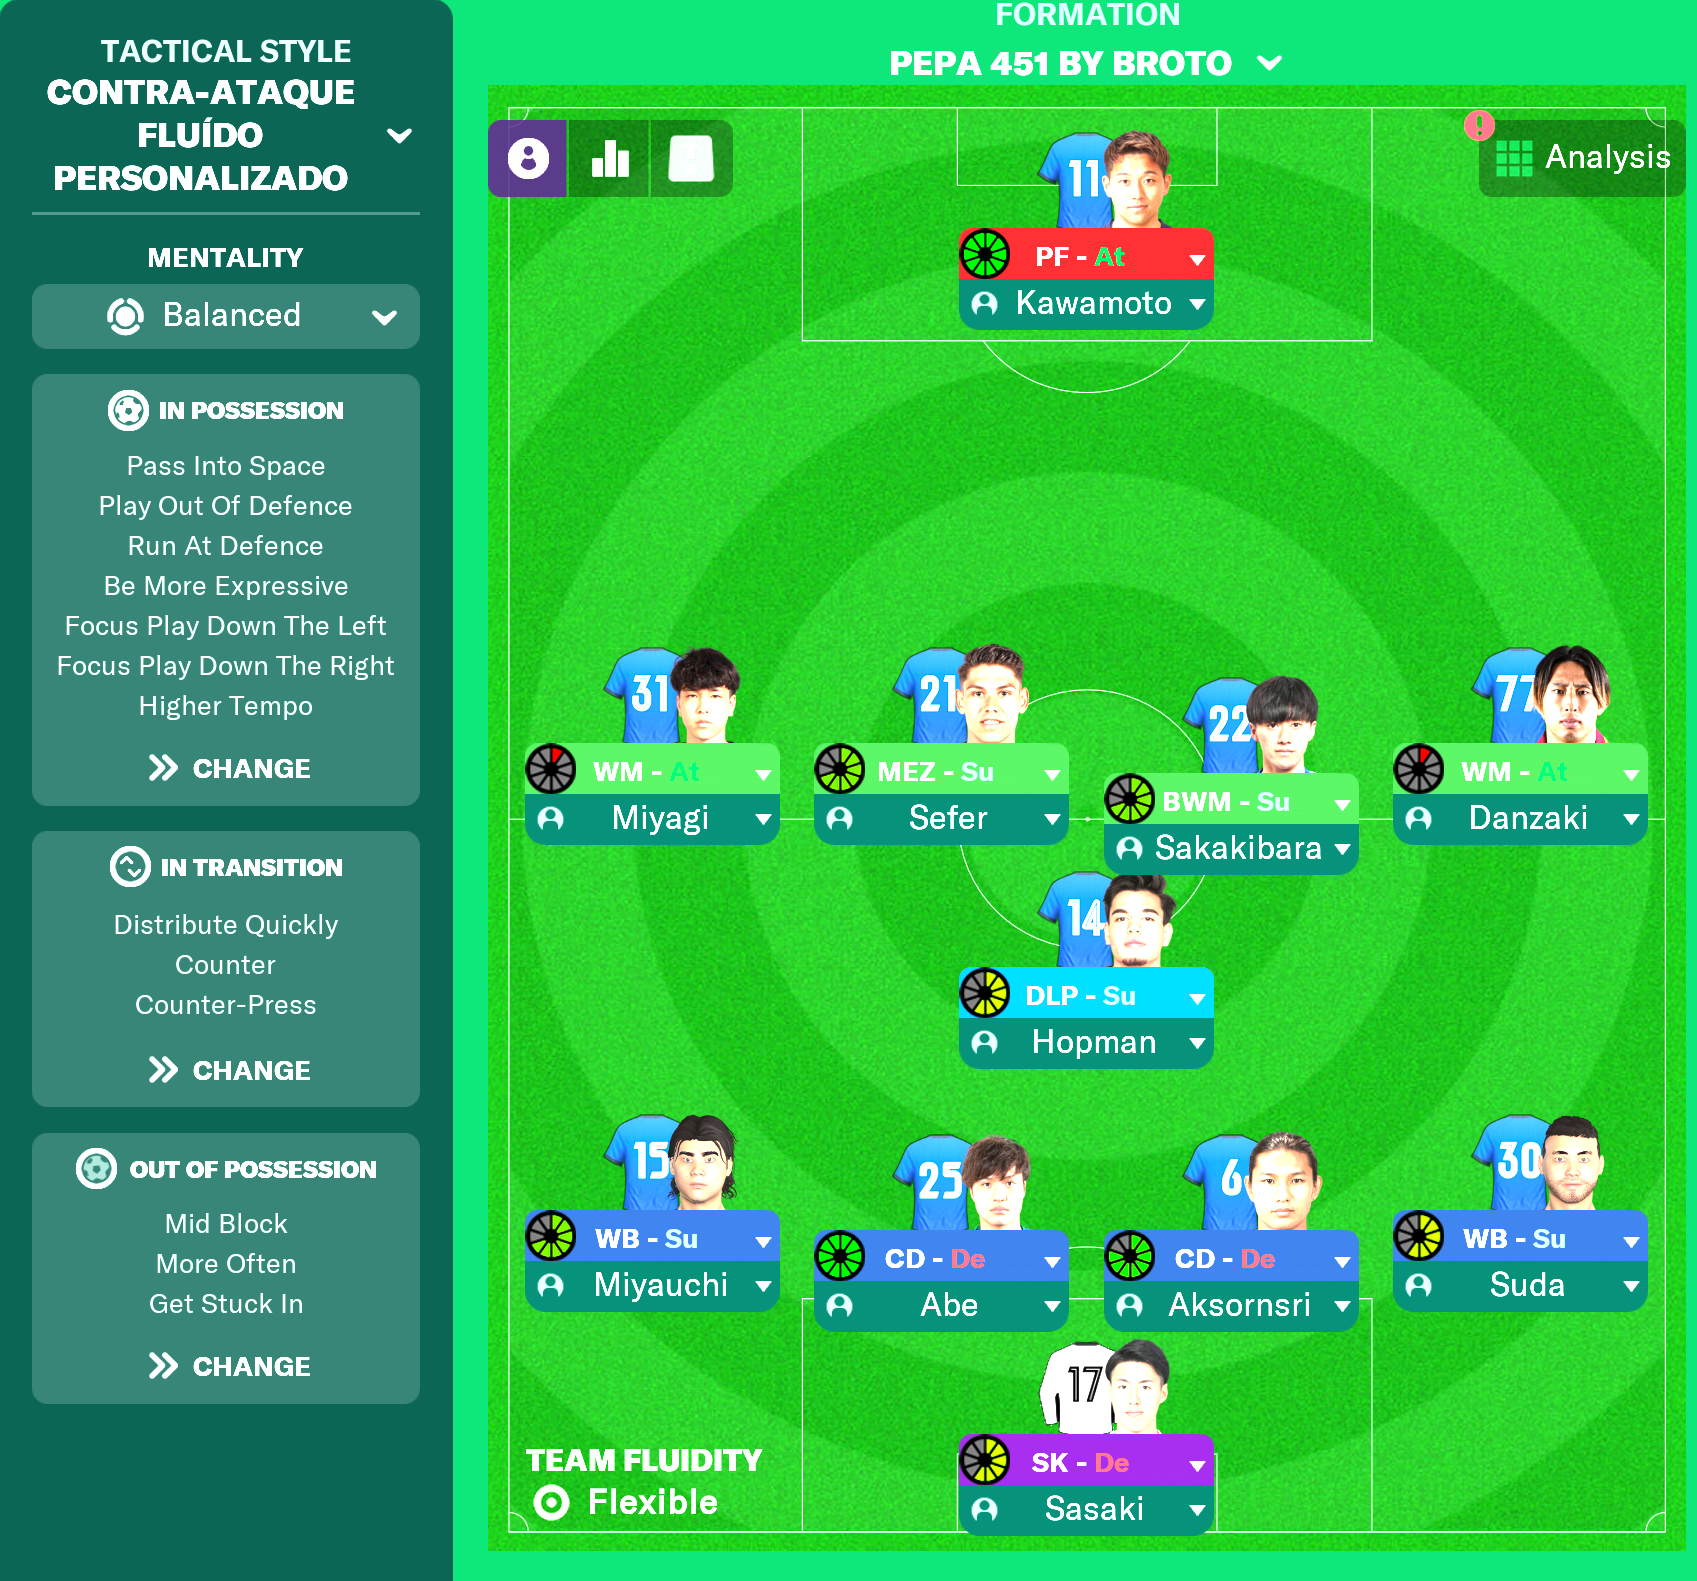
4-5-1 Defensive Counter
Classic defensive formation that packs the midfield and hits on the break.
- • Full-Backs (Defend)
- • Centre-Backs (Defend)
- • Disciplined positioning
- • Defensive Midfielder
- • Box-to-Box players
- • Wide Midfielders (Attack on one side, Support on the other); pure Support/Defend on both flanks suffocates the counter outlet
- • Poacher or Advanced Forward
- • Pace and finishing crucial
- • Hold-up play ability
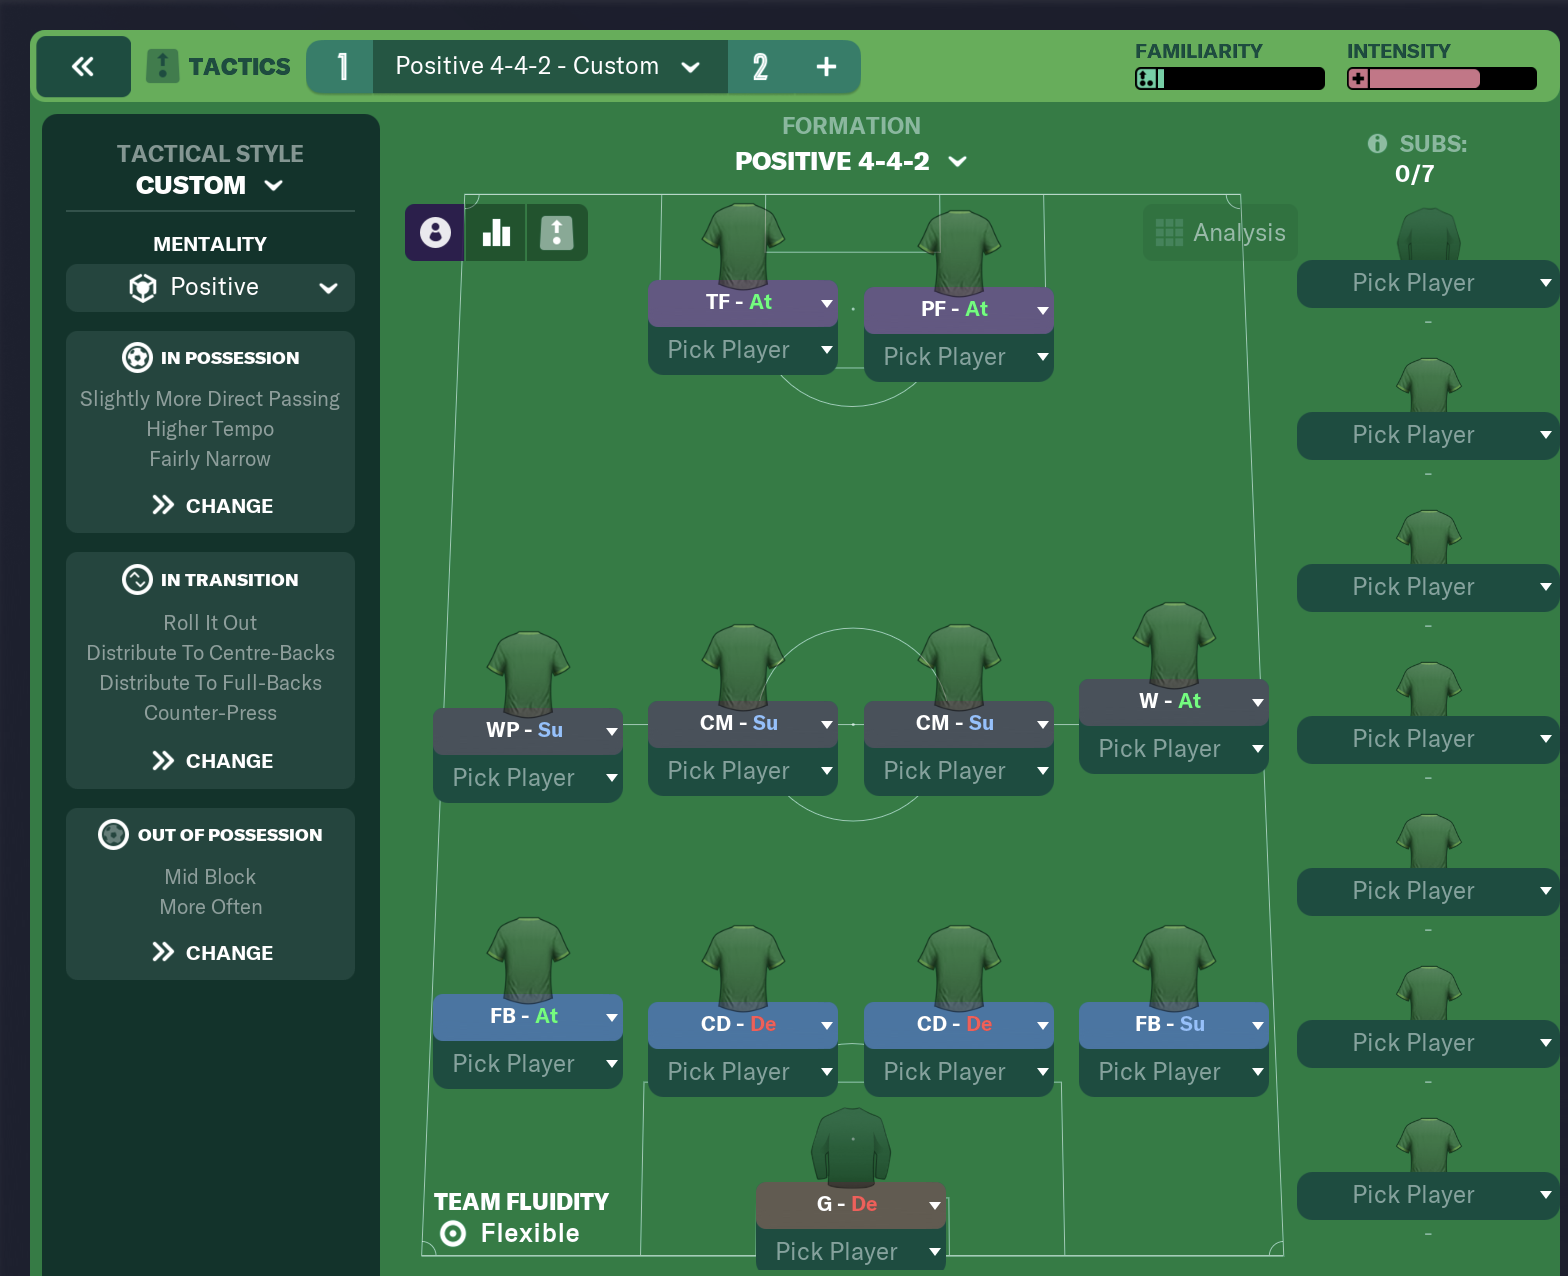
4-4-2 Counter Formation
Balanced approach with two strikers providing multiple counter-attacking outlets.
- • Conservative full-backs
- • Stopper + Cover combination
- • Defensive solidity priority
- • Defensive + Box-to-Box
- • Wide Midfielders (Support)
- • Work rate and stamina key
- • Target Forward + Poacher
- • Or two pacey forwards
- • Different skillsets complement
5-3-2 Defensive Block
Ultra-defensive setup with wing-backs providing width in transition.
- • Three Centre-Backs
- • Wing-Backs (Defend)
- • Excellent aerial ability
- • Anchor (Defend) in the DM slot
- • Two Box-to-Box players in the CM slots
- • Energy and distribution
- • Target Forward + a Support-duty partner (e.g. DLF-S)
- • Physical presence
- • Link-up play important
Essential Player Roles
Defensive Roles
Defensive Midfielder (Defend)
The anchor who breaks up play and starts counter-attacks.
- • High Tackling and Marking
- • Good Passing range
- • Excellent Positioning
- • Strong Anticipation
Centre-Back (Defend)
Solid defenders who can distribute quickly when winning the ball.
- • Marking and Tackling
- • Heading and Jumping Reach
- • Passing (for distribution)
- • Composure under pressure
Transition Roles
Box-to-Box Midfielder (Support)
Links defence and attack, crucial for counter-attacking success.
- • Stamina for constant running
- • Passing to start attacks
- • Tackling for ball recovery
- • Pace for transition runs
Winger (Support)
Provides width in counter-attacks while tracking back defensively.
- • Pace and Acceleration
- • Crossing ability
- • Work Rate for tracking back
- • Dribbling to beat players
Attacking Roles
Poacher (Attack)
Clinical finisher who makes runs to exploit counter-attacking space.
- • Off the Ball movement
- • Finishing and Composure
- • Pace to break the line
- • Anticipation for through balls
Target Forward (Support)
Holds up play and brings others into counter-attacks.
- • Strength and Balance
- • Heading for long balls
- • Passing to link play
- • Hold-up play technique
Team Instructions for Counter-Attacking
Essential Instructions
- Counter: Fundamental instruction for quick transitions
- Direct Passing: Gets ball forward quickly
- Lower Defensive Line: Compact defensive shape
- Narrower: Reduces space for opponents (width dial)
- Hit Early Crosses (conditional): Useful for wide-cross counters when your strikers are aerial and the ball is already wide; not appropriate for central transitions through a Box-to-Box midfielder.
Instructions to Avoid
- More Urgent / Extremely Urgent pressing: Leaves gaps for opponents to exploit
- Retain Possession: Contradicts direct approach
- Work Ball Into Box: Too slow for counter-attacks
- Shorter Passing: Reduces speed of transition
- Wider: Can slow down counter-attacks
Training and Development
Key Training Focus Areas
Defensive Training
- • Defending: General defensive skills
- • Tackling: Winning the ball cleanly
- • Positioning: Maintaining compact shape
- • Teamwork: Coordinated defending
Transition Training
- • Attacking Movement: Off-ball runs
- • Passing: Quick distribution
- • Crossing: Wide delivery quality
- • Counter-Attacking: Specialized training
Physical Preparation
- • Fitness: Stamina for intensive defending
- • Pace: Speed for counter-attacks
- • Strength: Physical duels
- • Agility: Quick changes of direction
Common Mistakes and Solutions
Problem: Too Defensive, No Threat
Team defends well but creates very few scoring opportunities.
Solution: Ensure at least one midfielder on Support duty, improve passing attributes of defenders.
Problem: Slow Transitions
Takes too long to move from defence to attack, losing the counter-attacking advantage.
Solution: Use "Direct Passing" instruction, improve first touch and passing of key players.
Problem: Isolated Attackers
Forwards receive the ball but have no support, leading to lost possession.
Solution: Use Box-to-Box midfielders on Support, add "Get Further Forward" to one midfielder.
When to Use Counter-Attacking
Perfect Situations
- • Playing against stronger opponents
- • Away matches against attacking teams
- • When you have pacey forwards
- • Against possession-heavy teams
- • In cup competitions (lower risk)
Consider Alternatives
- • Against defensive opponents
- • When expected to dominate possession
- • With slow, technical players
- • When chasing multiple goals
- • Against counter-attacking teams
Real-World Examples
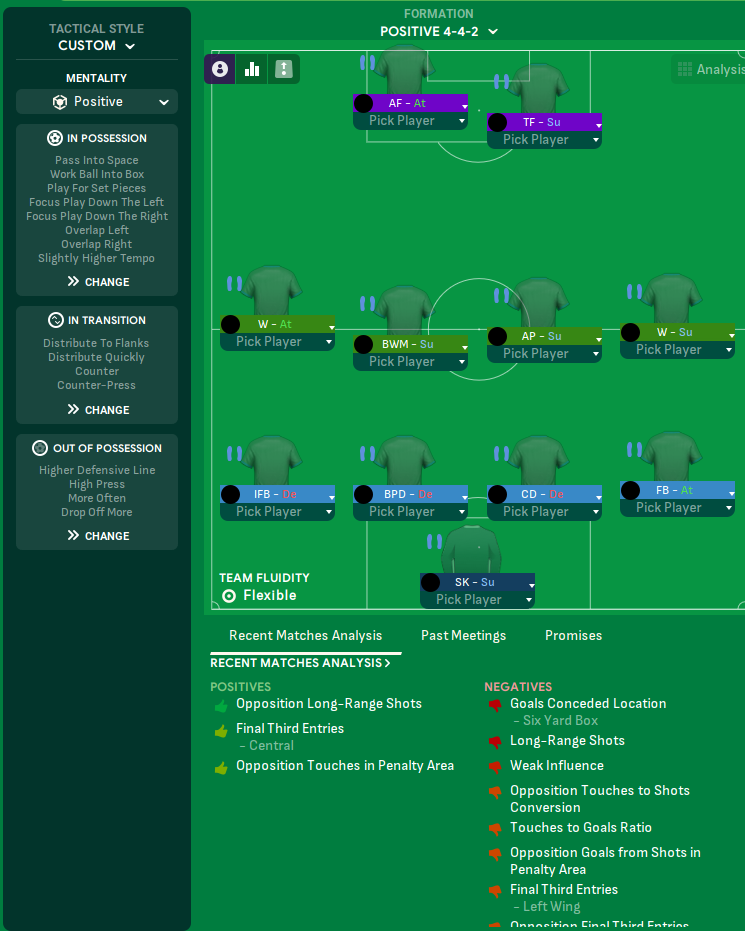
The two reference points most FM players reach for are José Mourinho's 2003-04 Porto and Diego Simeone's Atlético Madrid. They aren't the same setup. Mourinho's Porto played a true counter: sit deep, win the ball, release a striker running the channel before the opposition can recover shape. To get this in FM you set Cautious mentality, Lower Defensive Line, Direct Passing, Counter, plus Regroup on the transition out and Less Urgent pressing intensity, with a striker on Advanced Forward duty. The risk is that with Counter and Lower Defensive Line your front line gets isolated; the fix is a Box-to-Box midfielder who genuinely covers ground.
Simeone's Atlético is a hybrid. They defend in a compact 4-4-2 mid block and counter through the channels. The mid block is what makes the difference; they're forcing the opposition to commit numbers, then breaking on the turnover. The FM equivalent is a 4-4-2 with Cautious mentality, Standard Defensive Line, Standard Line of Engagement, and Counter, plus Less Urgent pressing intensity (canonical baseline) and Get Stuck In off. Up front you want one striker who drops to receive and link (a Deep-Lying Forward on Support) and one who runs the channel (an Advanced Forward or Poacher). One striker alone gets isolated; two strikers can combine to escape pressure.
The lesson for FM is that even possession-style squads can be set up to counter in specific games, and you don't need to overhaul your tactic to do it. When you draw a tougher opponent away from home and want to flip from a possession default to a transition game for the night, shift mentality from Positive to Cautious, swap one or two Attack-duty roles for Support, and let the duties do the rest. The shape stays the same; the intent changes.
Frequently Asked Questions
Why aren't my counter-attacks reaching the striker?
Almost always a passing-attribute mismatch in midfield. Your distributor's Vision and Passing matter. If your DM has low vision and you're asking for direct counter-attacks, the player tends to choose the safer sideways pass and the moment is gone. Either upgrade the distributor or change the route. Switch to Focus Play Down the Right or Left plus Hit Early Crosses instead, where the ball doesn't have to go through midfield at all.
Should I use a Target Forward or a Poacher up top?
Depends on what you're countering against. Against teams that play a high line, a Poacher with pace, who runs in behind. Against teams that drop deep, a Target Forward who can hold the ball up while runners join him. Many FM players default to Poacher and then wonder why they're 0-0 against a deep block.
Can a counter-attacking team also press?
Yes, but mid-block, not high. The pairing of Lower Defensive Line + Counter-Press is the contradiction that ruins most attempts; your strikers run forward to press while your back line stays deep, and the gap is enormous. The canonical fix is one of three: (1) raise the line to Standard with a regular Line of Engagement and More Urgent pressing intensity; (2) raise the line all the way to Higher so the press has cover behind it; or (3) keep the Lower Defensive Line but switch from Counter-Press to Regroup so the front line drops with the block. Set Line of Engagement to Standard with Pressing Intensity at More Urgent in the middle third; that's where you want to win the ball before launching the break.
What's the most common counter-attacking mistake in FM?
Pairing Counter with Work Ball Into Box. Counter says "go fast"; WBIB says "be patient". In practice, the contradiction tends to leave Counter ineffective, and managers spend a season wondering why their counter tactic doesn't counter.
Should I sit on a 1-0 lead with counter-attacking instructions?
Late in the match, yes, but be careful about how. Switching to Defensive mentality and Lower Defensive Line at 80 minutes invites the kind of pressure you can't always survive. A more sustainable approach is staying on Cautious, swapping Attack-duty roles for Support, and using your two subs to refresh the pressing midfielders. Time-wasting comes from squad choices, not from cranking the mentality dial.
Conclusion
Counter-attacking is duty-asymmetry plus transition discipline. The shell holds because one CB steps and the other covers; the break works because the ball-winner is set up to find a runner already moving. Get those two things right and the rest (Counter binary, Direct Passing, a single channel-runner up top) falls into place. Get them wrong and no number of TI tweaks rescues the shape.
Related guides
Keep exploring the tactical library. These go well with the topic above.
Understanding the 4-3-3 Formation
Master the classic 4-3-3: player roles, tactical variations, and the trade-offs that decide whether it sings or stalls.
Possession-Based Tactics in Football Manager
Build the patient, control-the-tempo style without watching your opponents counter through the gaps you leave behind.
Defensive Transitions
The five seconds after losing the ball decide most matches. Counter-press, drop-and-recover, and how to know which one you should be doing.