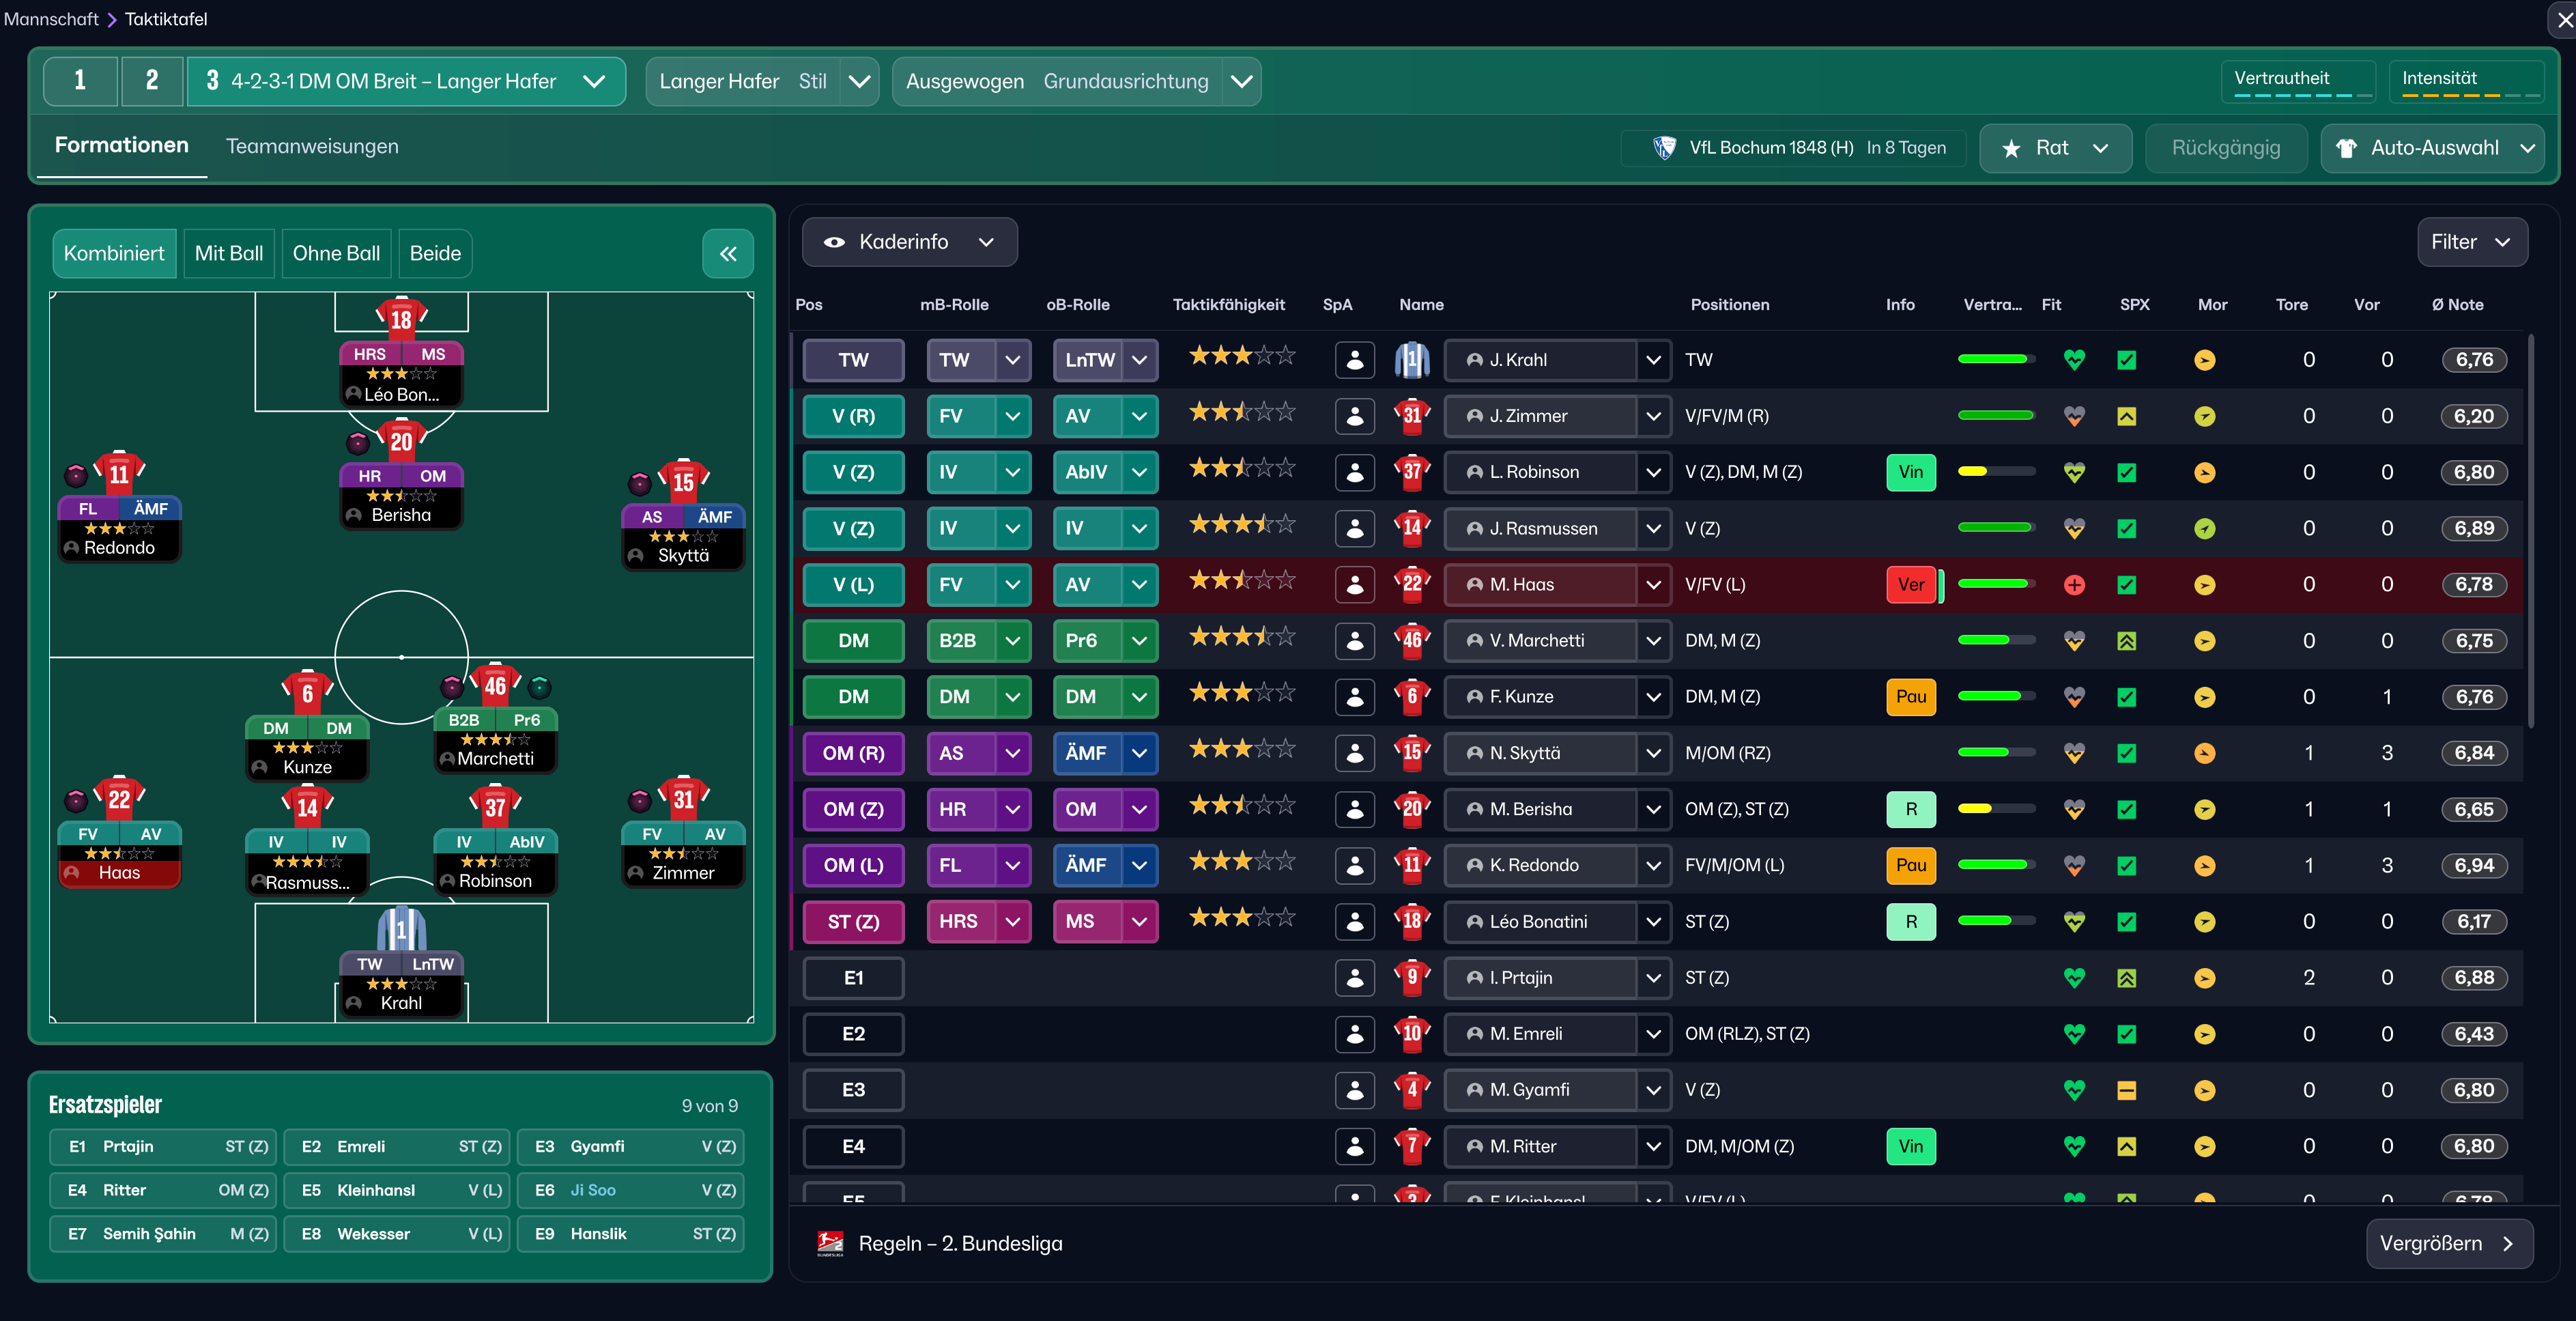
Uploaded Tactic

Formation & Style
Tactical Style:Gegenpress
Mentality:Attacking
Formation:4-2-3-1
Team Fluidity:Flexible
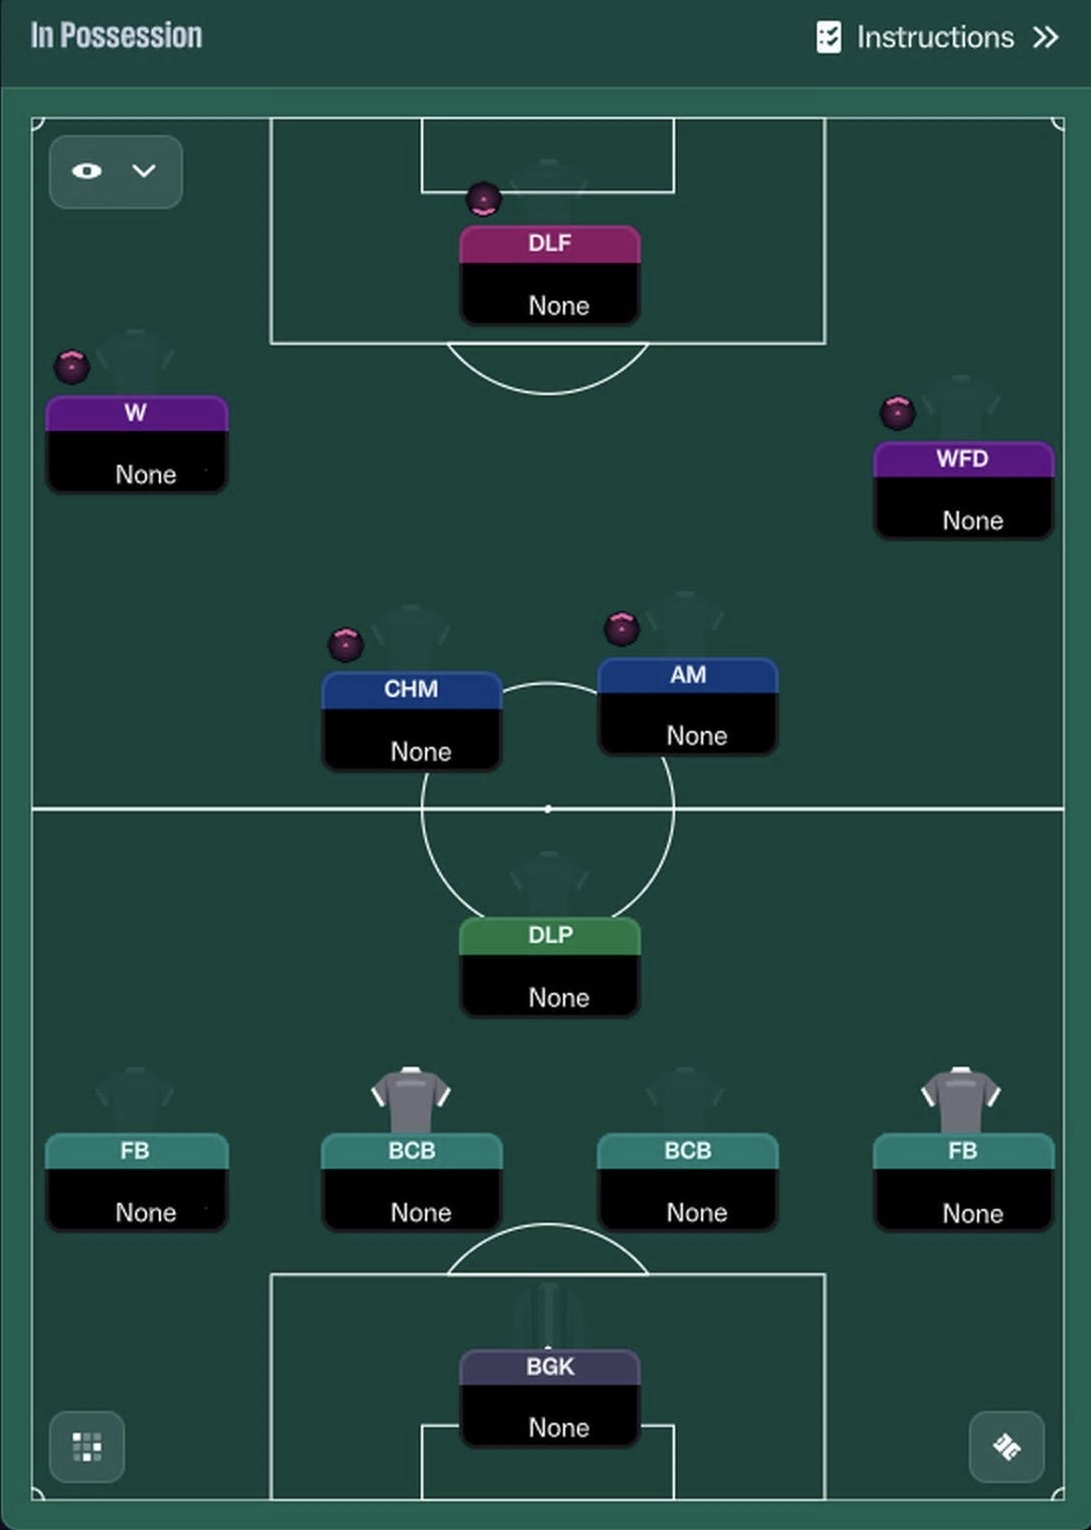
In Possession
Slightly More Direct Passing
Pass Into Space
Play Out Of Defence
Run At Defence
Be More Expressive
Overlap Left
Higher Tempo
Narrow
In Transition
Distribute To Centre-Backs
Distribute To Full-Backs
Distribute Quickly
Counter
Counter-Press
Out of Possession
Higher Defensive Line
High Press
Much More Often Step Up More
Team Shape Without Ball
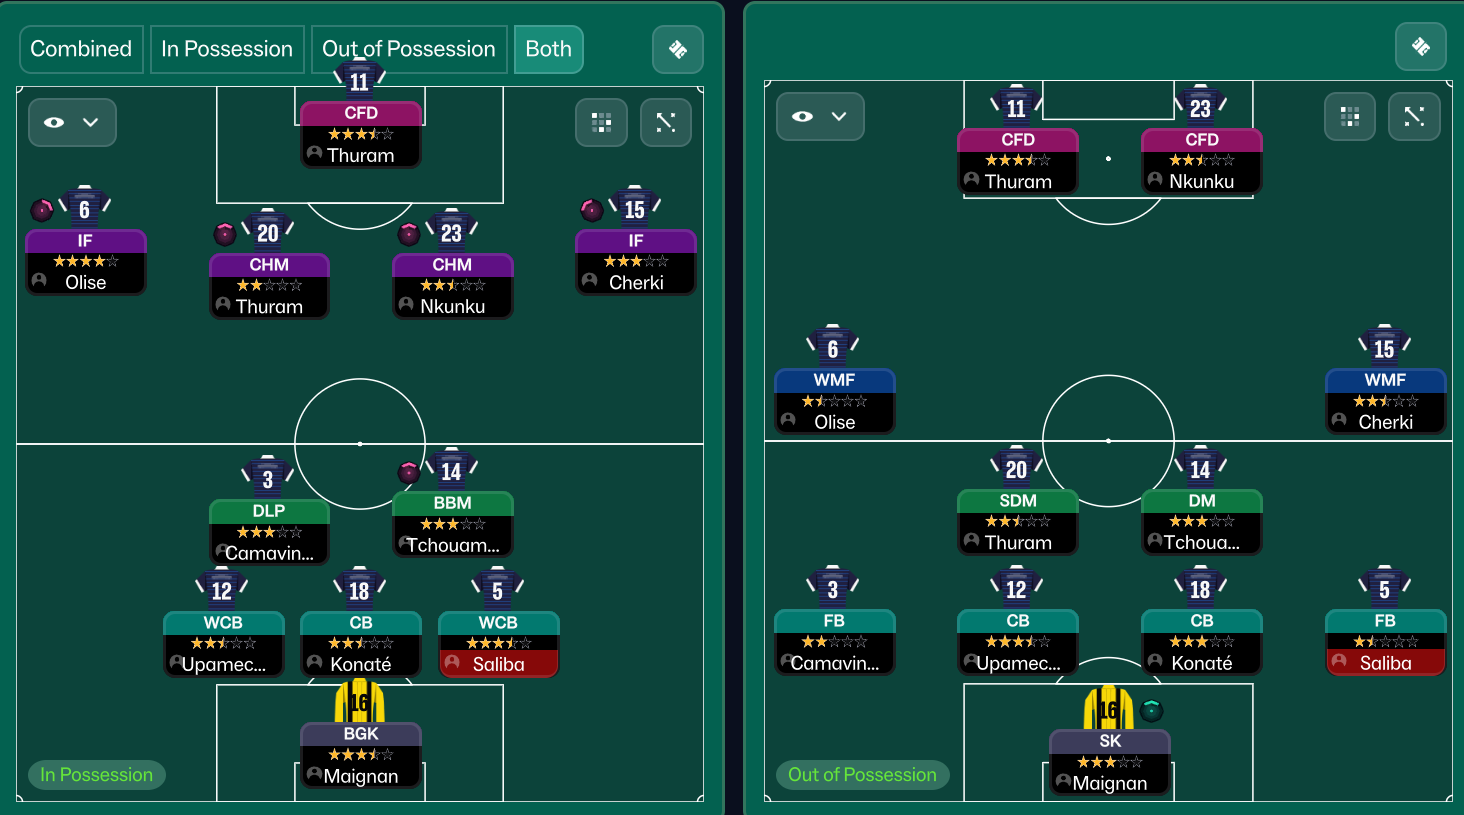
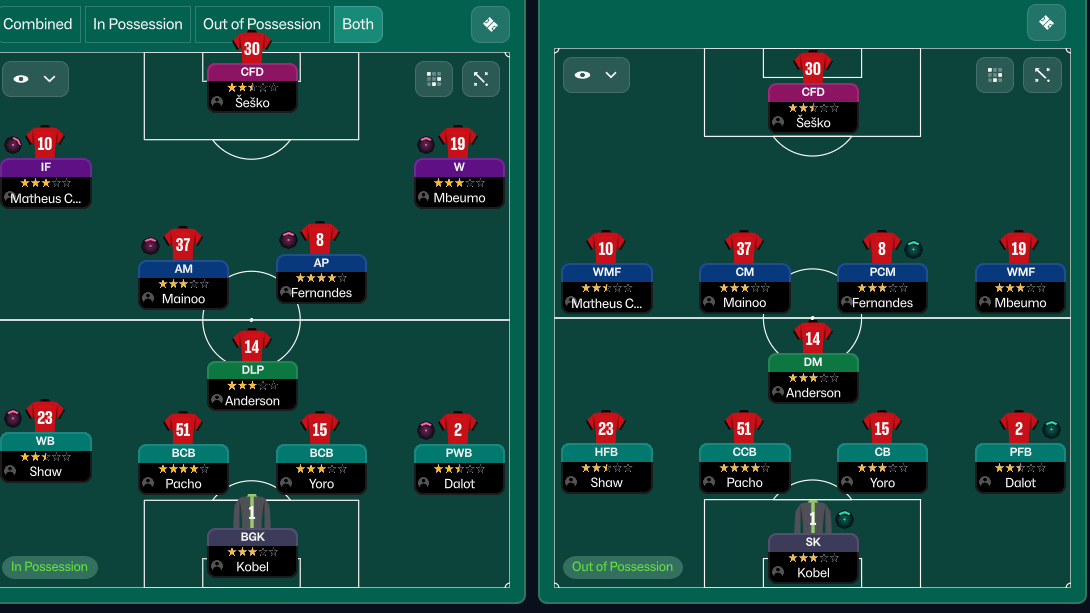
Shape:4-2
Description:Compact 4-2 shape that provides defensive stability while allowing quick transitions.
Evidence:BPD-D at [2,2] and [2,3] supports central defense with DLP-S and BWM-D anchoring midfield.
Team Shape With Ball
Shape:4-1-3-2
Description:Utilizes wing-backs to provide width, allowing the attackers to exploit central areas.
Evidence:WB-S at [2,4] and CWB-S at [2,5] support wingers, freeing up AP-A at [5,3] for goal-scoring opportunities.
Phase Description
Attacking Play
Focused on high pressing and quick transitions, utilizing width by overlapping full-backs to create space for attacking midfielders and forwards.
Defensive Transition
Quickly regroup into a compact shape when possession is lost, with an emphasis on immediate counter-pressing.
Main Focus
Exploit width with overlapping runs while maintaining attacking tempo.
Key Strengths
Attacking Width
Effective use of wing-backs to stretch opposition defenses, creating space in central areas.
Pressing Strategy
Employing a high press to regain possession quickly and disrupt opposition buildup.
Fluid Midfield Play
Combination of DLP-S and BWM-D allows for creative transitions and solid defensive cover.
Conflicting Directions
High Defensive Line Risks
High defensive line can lead to vulnerability against fast counter-attacks.
Tempo vs. Decision Making
Higher tempo may lead to rushed decisions and loss of possession in critical areas.
Overlapping Runs Clashing
Heavy overlapping from wing-backs might leave central areas exposed if possession is lost.
Tactical Suggestions
Adjust Defensive Line Height
Consider lowering the defensive line to mitigate risks from fast counters.
Balance Tempo
Moderate the tempo to improve decision-making and maintain possession during critical phases.
Controlled Overlaps
Implement more controlled overlapping runs to maintain midfield solidity when transitioning.
Ask Questions About Your Lineup
Guides for this formation
The tactical theory behind the 4-2-3-1: roles, instructions, and the trade-offs that decide whether the system holds up.
Player pairings
Midfield Pairs in 4-2-3-1 and 4-4-2
Double pivots and flat pairs in 4-2-3-1 and 4-4-2: when each pairing works, when it collapses, and the AMC unicorn that rescues both.
Read guide
Playing styles
Gegenpressing: A Full Guide
Klopp-style gegenpressing in FM, including squad profile, line-and-press pairing, sustainable workload, and the antipatterns to avoid.
Read guide