4-2-3-1 Tactic
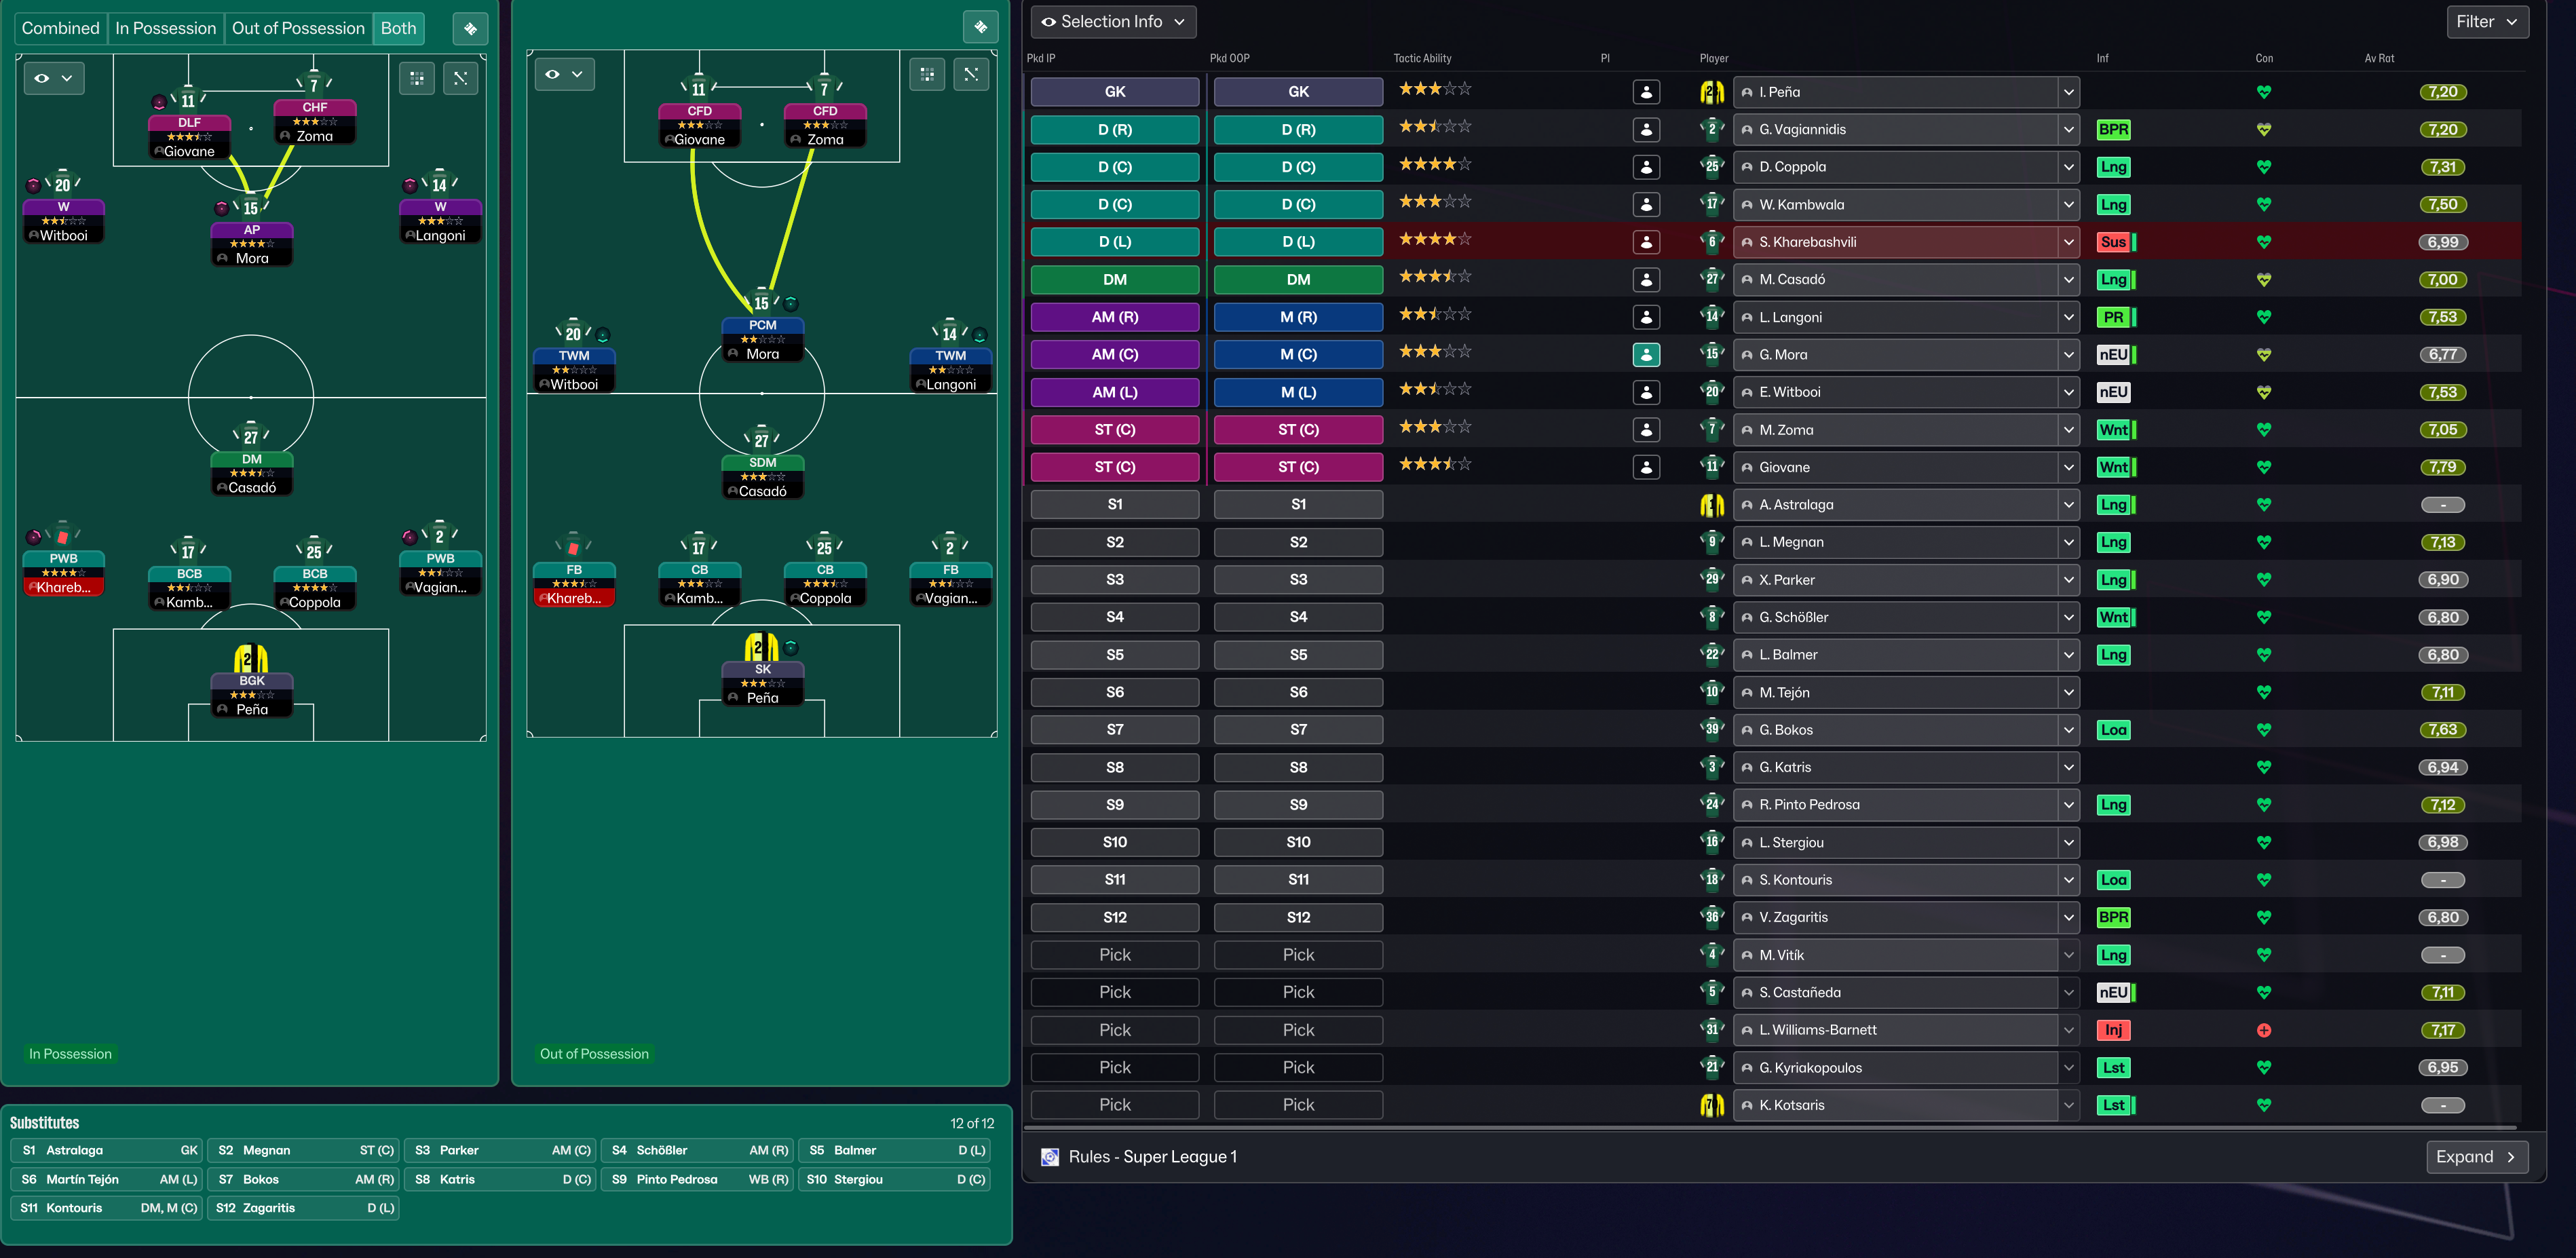
4-2-3-1
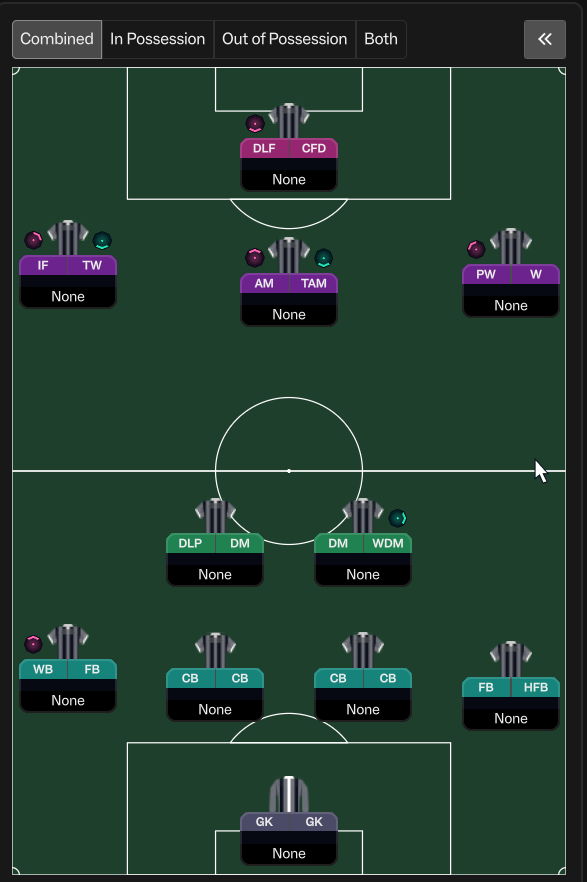
Creating clear shooting opportunities through structured passing in the final third. Having a DLP-S at [3,1] allows for effective ball distribution and…
Loading tactical analysis...
Formation and style
4-2-3-1
In possession
Work Ball Into Box
Play Out of Defence
Dribble Less
In transition
Counter
Counter Press
Out of possession
Higher Line of Engagement
Higher Defensive Line
Prevent Short GK Distribution
Player roles
GK
GK
None
Defence
FB
None
Defence
WB
None
Defence
CB
None
Defence
CB
None
Defence
CB
None
DM
DM
None
DM
DLP
None
AM
TAM
None
AM
AM
None
ST
CFD
None
ST
DLF
None
Phase description
The team aims for a balanced possession game, looking to play through the midfield and create chances by working the ball into the box.
Upon losing possession, players quickly transition to a counter-press to regain control.
Creating clear shooting opportunities through structured passing in the final third.
Team shape defence
Compact Four
Defensive structure primarily focused on maintaining a unified back line, bridging the gap between defence and midfield.
The presence of three CBs and a FB/WB configuration at [2,1], [2,2] and [2,3].
Team shape attack
Fluid Midfield Triangle
Midfielders work in tandem to support the strikers, creating multiple avenues for attacking play.
Use of a tandem AM role and wide players [6,1] to [6,4] supporting the DLF and CFD.
Key strengths
Strong Central Play
Having a DLP-S at [3,1] allows for effective ball distribution and control in central areas.
DLP-S at [3,1] with 'Play Out of Defence'.
Varied Offensive Options
Two different striker roles (DLF and CFD) create diverse attacking threats.
DLF at [6,2] and CFD at [6,3] contributing to alternative attacking strategies.
Conflicting tactics
Potential Midfield Overload
Double pivot may lead to congestion and limit wide play.
DM and DLP at [3,2] and [3,1] reducing space for wide players.
Dependence on Wing Play
Heavy reliance on wing-backs and wide midfielders could lead to a lack of central penetration.
FB and WB providing width at [2,1] and [2,2] may not suffice centrally.
Risk exposures
Risk Exposures
Items
Defensive Transition
High line increases vulnerability to fast breaks from opposition.
Higher Defensive Line and immediate pressing upon losing possession.
Wide Areas
Dependence on wing-backs could lead to imbalance if they are caught out of position.
FB and WB roles may leave central defence exposed.
Role synergies
Role Synergies
Items
DLP and DM
Complementary roles that balance defensive duties with playmaking.
DLP-S at [3,1] and DM at [3,2] collaborating for build-up play.
IF and TW
Inside Forward can exploit space created by the Wing Forward's runs.
IF at [5,1] benefiting from TW at [5,2]'s movement.
Suggested questions
How do you plan to adjust your defensive strategy against teams that counter quickly?
What are your plans for utilizing your wide players in the current setup?
Are there specific instructions you're focusing on to improve midfield transitions?
Related Tactics
Guides for this tactic
The tactical theory behind the 4-2-3-1: roles, instructions, and the trade-offs that decide whether the system holds up.
Player pairings
Midfield Pairs in 4-2-3-1 and 4-4-2
Double pivots and flat pairs in 4-2-3-1 and 4-4-2: when each pairing works, when it collapses, and the AMC unicorn that rescues both.
Read guide
Playing styles
Gegenpressing: A Full Guide
Klopp-style gegenpressing in FM, including squad profile, line-and-press pairing, sustainable workload, and the antipatterns to avoid.
Read guide
Match preparation
Game-State Tactics
Protect a 1-0, chase a 1-0, hold a draw away. How to manage game state in FM through duties and roles, not by lurching to Defensive.
Read guide