Vertical Tiki-Taka 4-3-3 (Attacking) Tactic
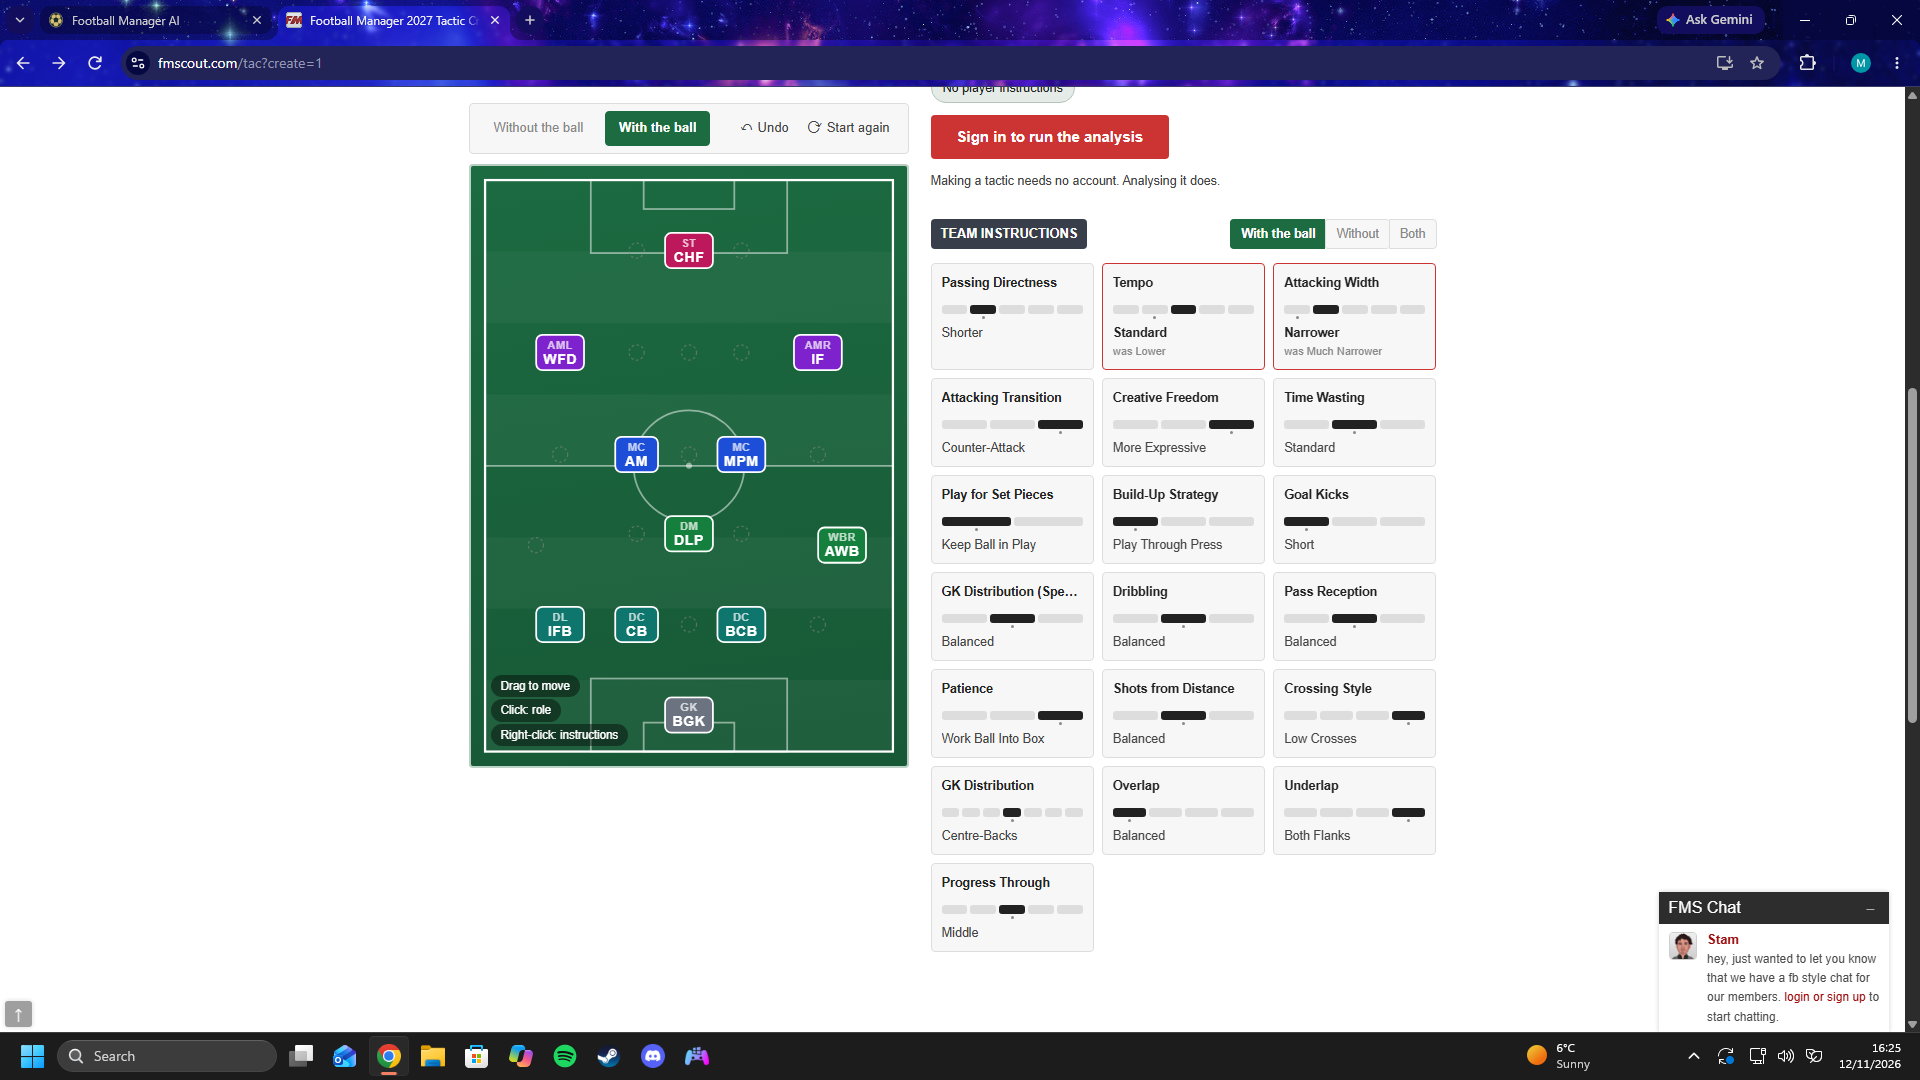
4-3-3
Utilizing wing play and midfield overloads while maintaining a high pressing game. The Wing-Backs are heavily involved in attacks, providing width and…
Loading tactical analysis...
Formation and style
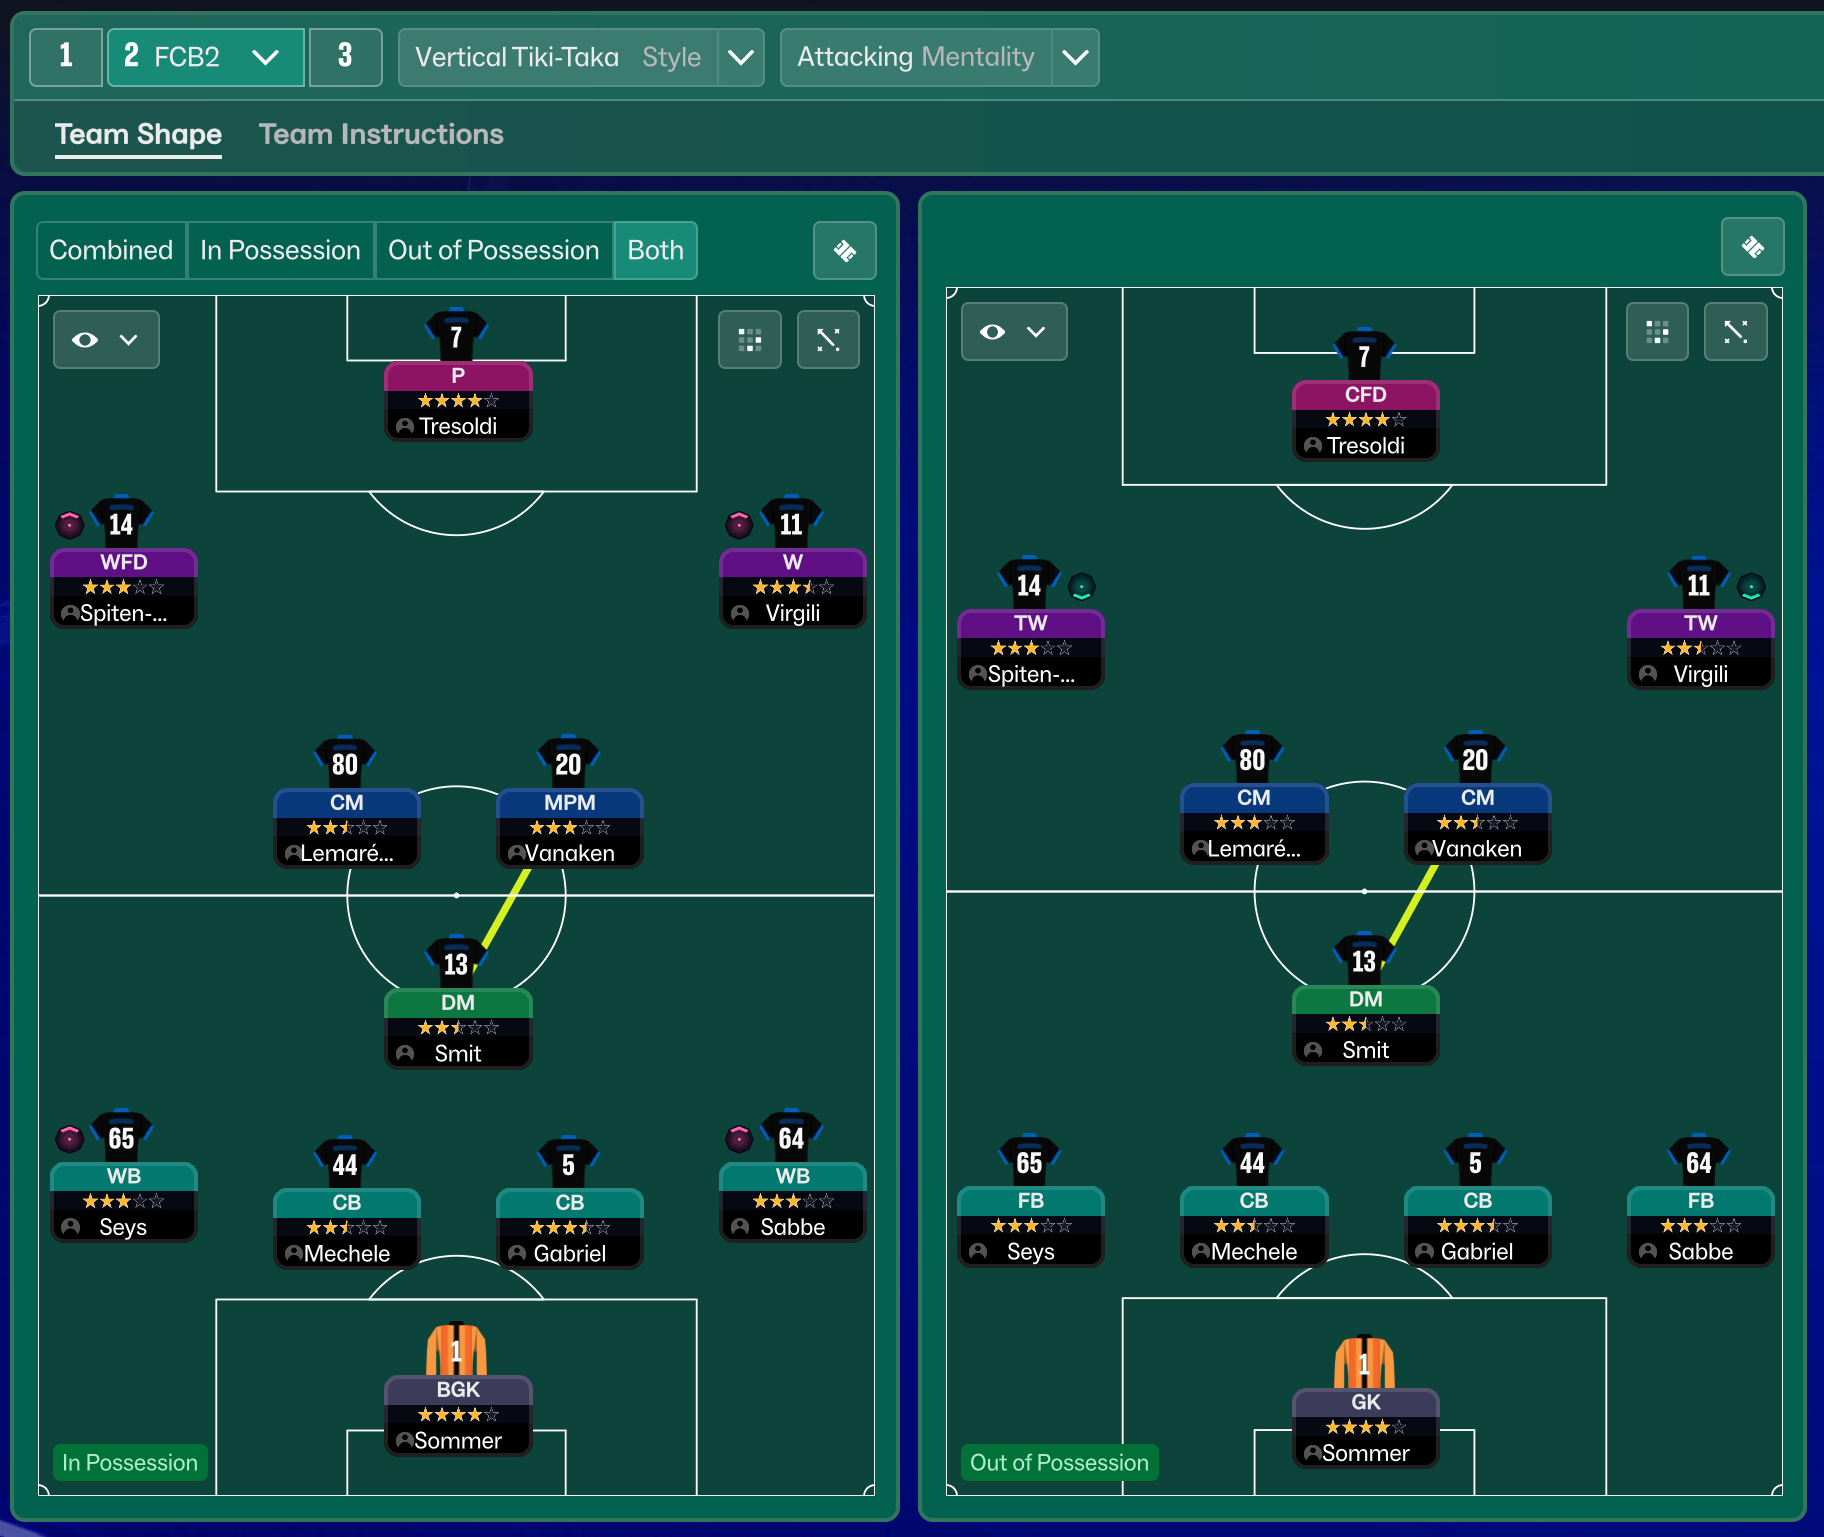
Vertical Tiki-Taka
Attacking
4-3-3
In possession
Play Out of Defence
Focus Play Down the Right
Work Ball Into Box
In transition
Counter-Press
Counter
Out of possession
Higher Defensive Line
Higher Line of Engagement
Prevent Short GK Distribution
Player roles
GK
Goalkeeper
Defend
RB
Wing-Back
Attack
CB
Centre-Back
Defend
CB
Centre-Back
Defend
LB
Wing-Back
Attack
DM
Defensive Midfielder
Defend
CM
Central Midfielder
Support
CM
Mezzala
Attack
RW
Wide Forward
Attack
CF
Complete Forward
Attack
LW
Wide Forward
Attack
Phase description
Fluid build-up play focusing on ball retention and exploiting spaces on the wings. Quick transitions through the midfield.
Rapidly reorganizes to press high and regain possession quickly.
Utilizing wing play and midfield overloads while maintaining a high pressing game.
Team shape defence
4-1-4-1
Compact structure that closes down space while maintaining width through wing-backs.
Wing-Backs at [2,5] and [2,1] providing width with a solid central defense.
Team shape attack
4-3-3
Utilizes width effectively through the wide forwards and overlapping wing-backs, with midfield support for creativity.
Complete Forward at [6,3] complemented by attacking wide forwards at [6,2] and [6,4].
Key strengths
Wing-Back Influence
The Wing-Backs are heavily involved in attacks, providing width and options on the flanks.
Wing-Backs at [2,5] and [2,1] with 'Attack' duty supporting width.
Midfield Control
Strong midfield presence allows for better control and distribution.
CM and MPM roles at [3,3] and [3,4] supporting possession.
Conflicting tactics
Overreliance on Wings
Excessive focus on wing play may leave central options underutilized.
Wide Forward duties at [6,2] and [6,4] could limit central breakthroughs.
High Defensive Line Vulnerability
A higher defensive line can be exposed to quick counter-attacks.
'Higher Defensive Line' instruction without adequate pace in defense.
Risk exposures
Risk Exposures
Items
Wide Flanks
Exposure to transition plays down the wings can be detrimental.
WBs at [2,5] and [2,1] can be caught higher up field.
Central Midfield
Weakness in transitional play can lead to being outnumbered in midfield.
Dependence on DM at [3,1] leaving gaps for counters.
Role synergies
Role Synergies
Items
DM and CM
DM providing cover allows CMs to advance into attacking spaces.
DM at [3,1] supports advanced CMs at [3,3] and [3,4].
Complete Forward and Wide Forwards
Complete Forward links well with Wide Forwards, creating space and options.
CF at [6,3] facilitating play to WFs at [6,2] and [6,4].
Suggested questions
How can I further optimize midfield support during transitions?
What adjustments can be made to enhance defensive resilience?
Should I consider a more balanced approach in attacking strategy?
Related Tactics
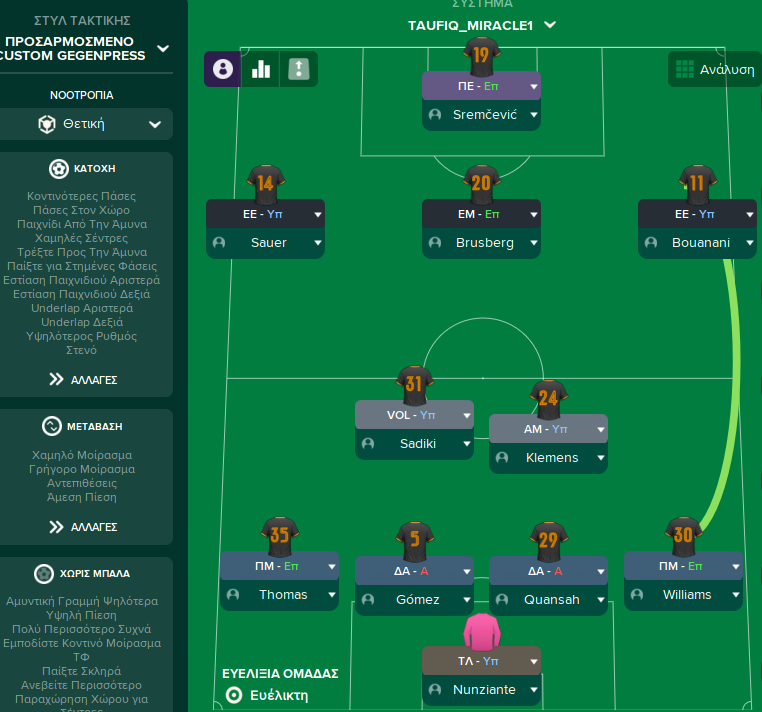
More Vertical Tiki-Taka tactics
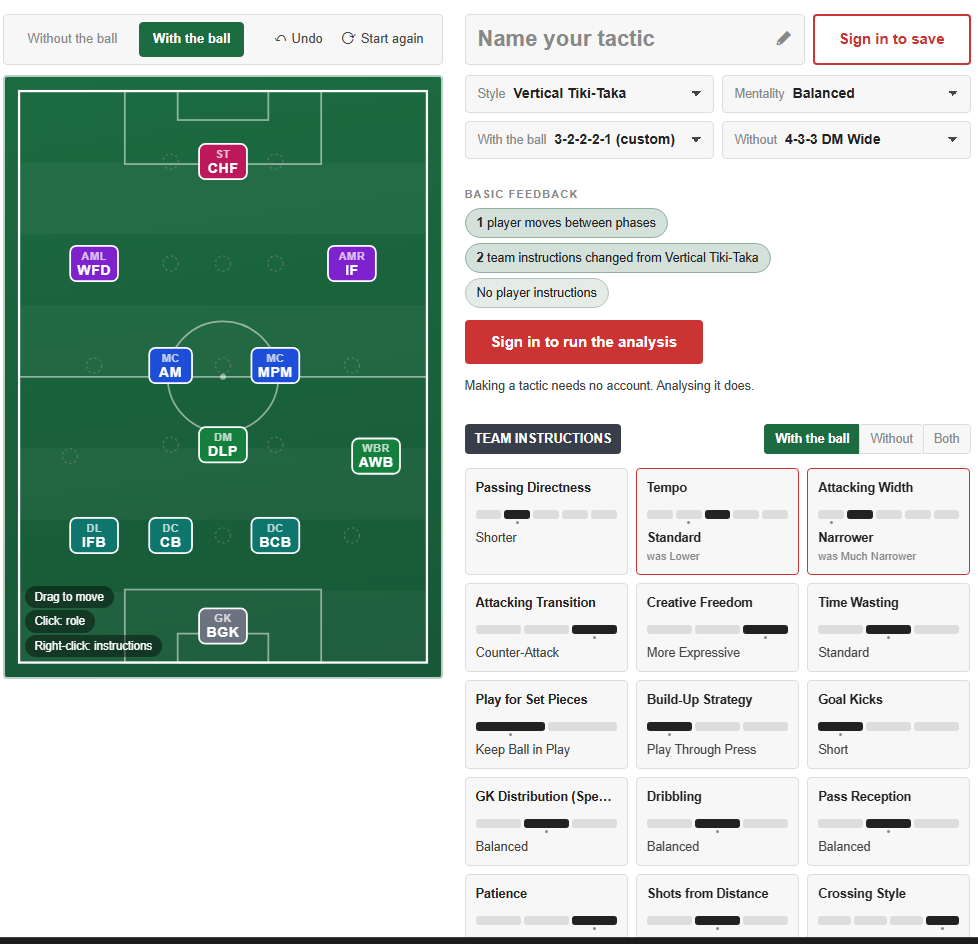
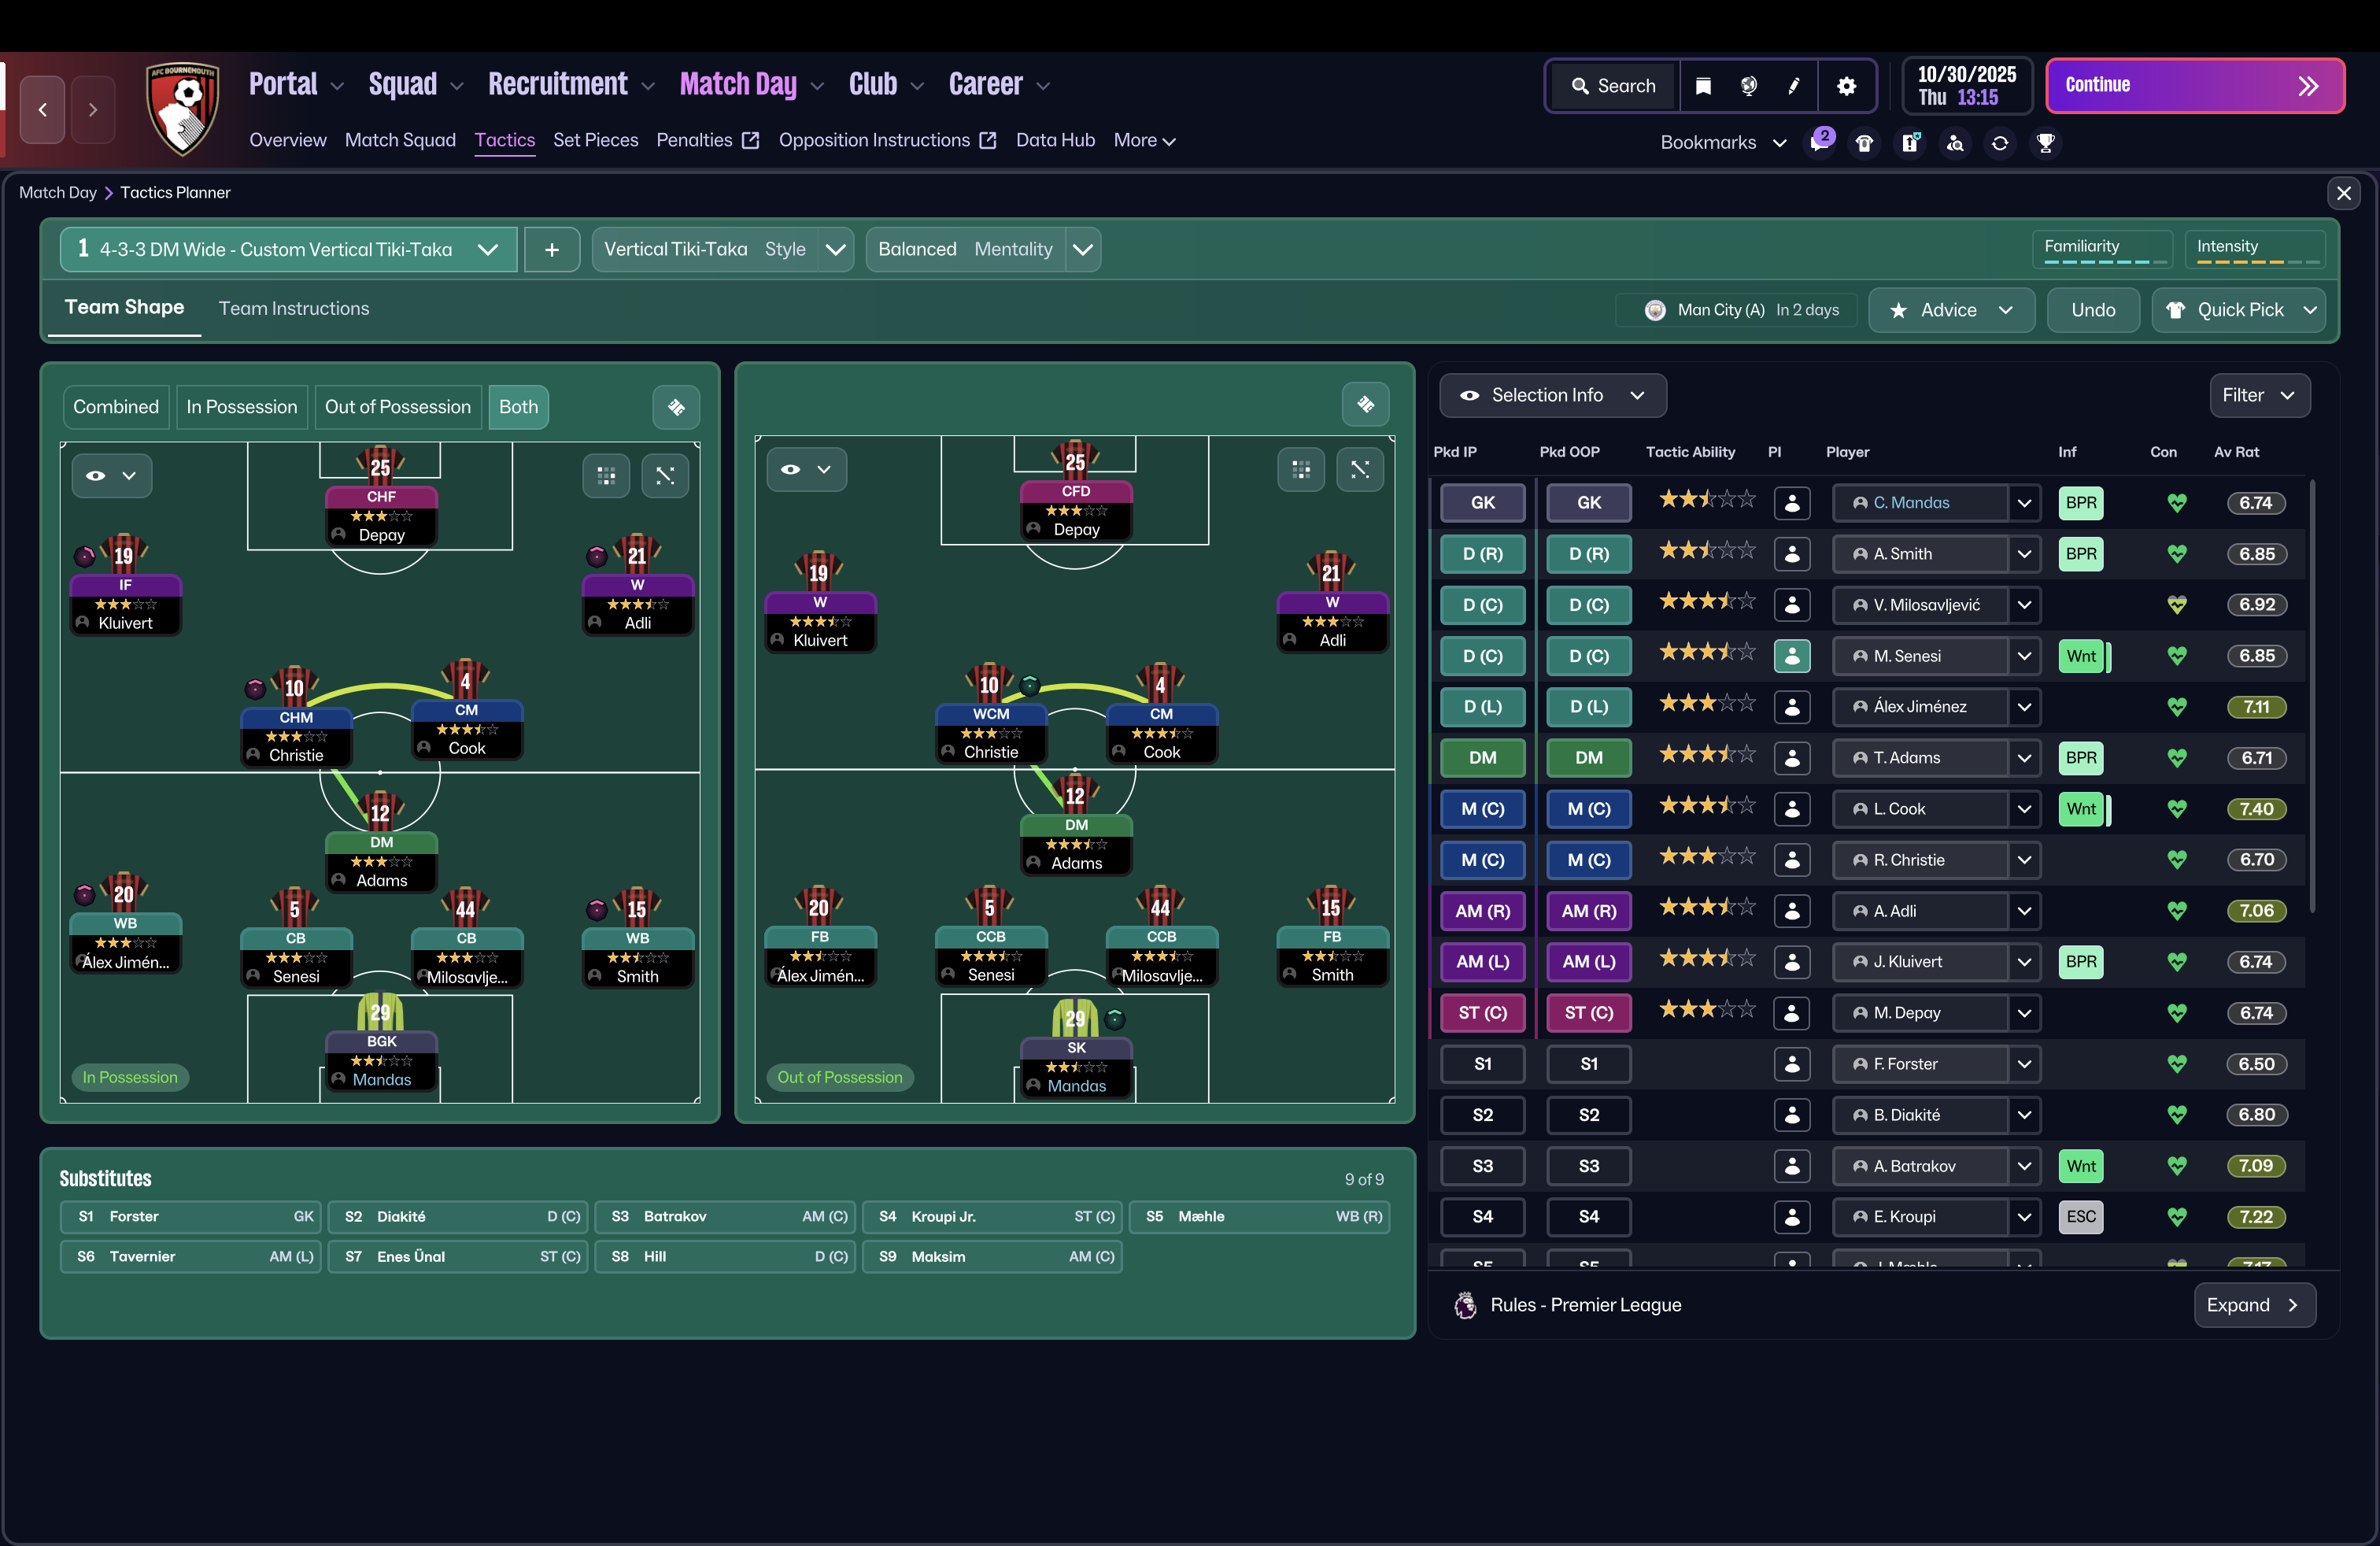
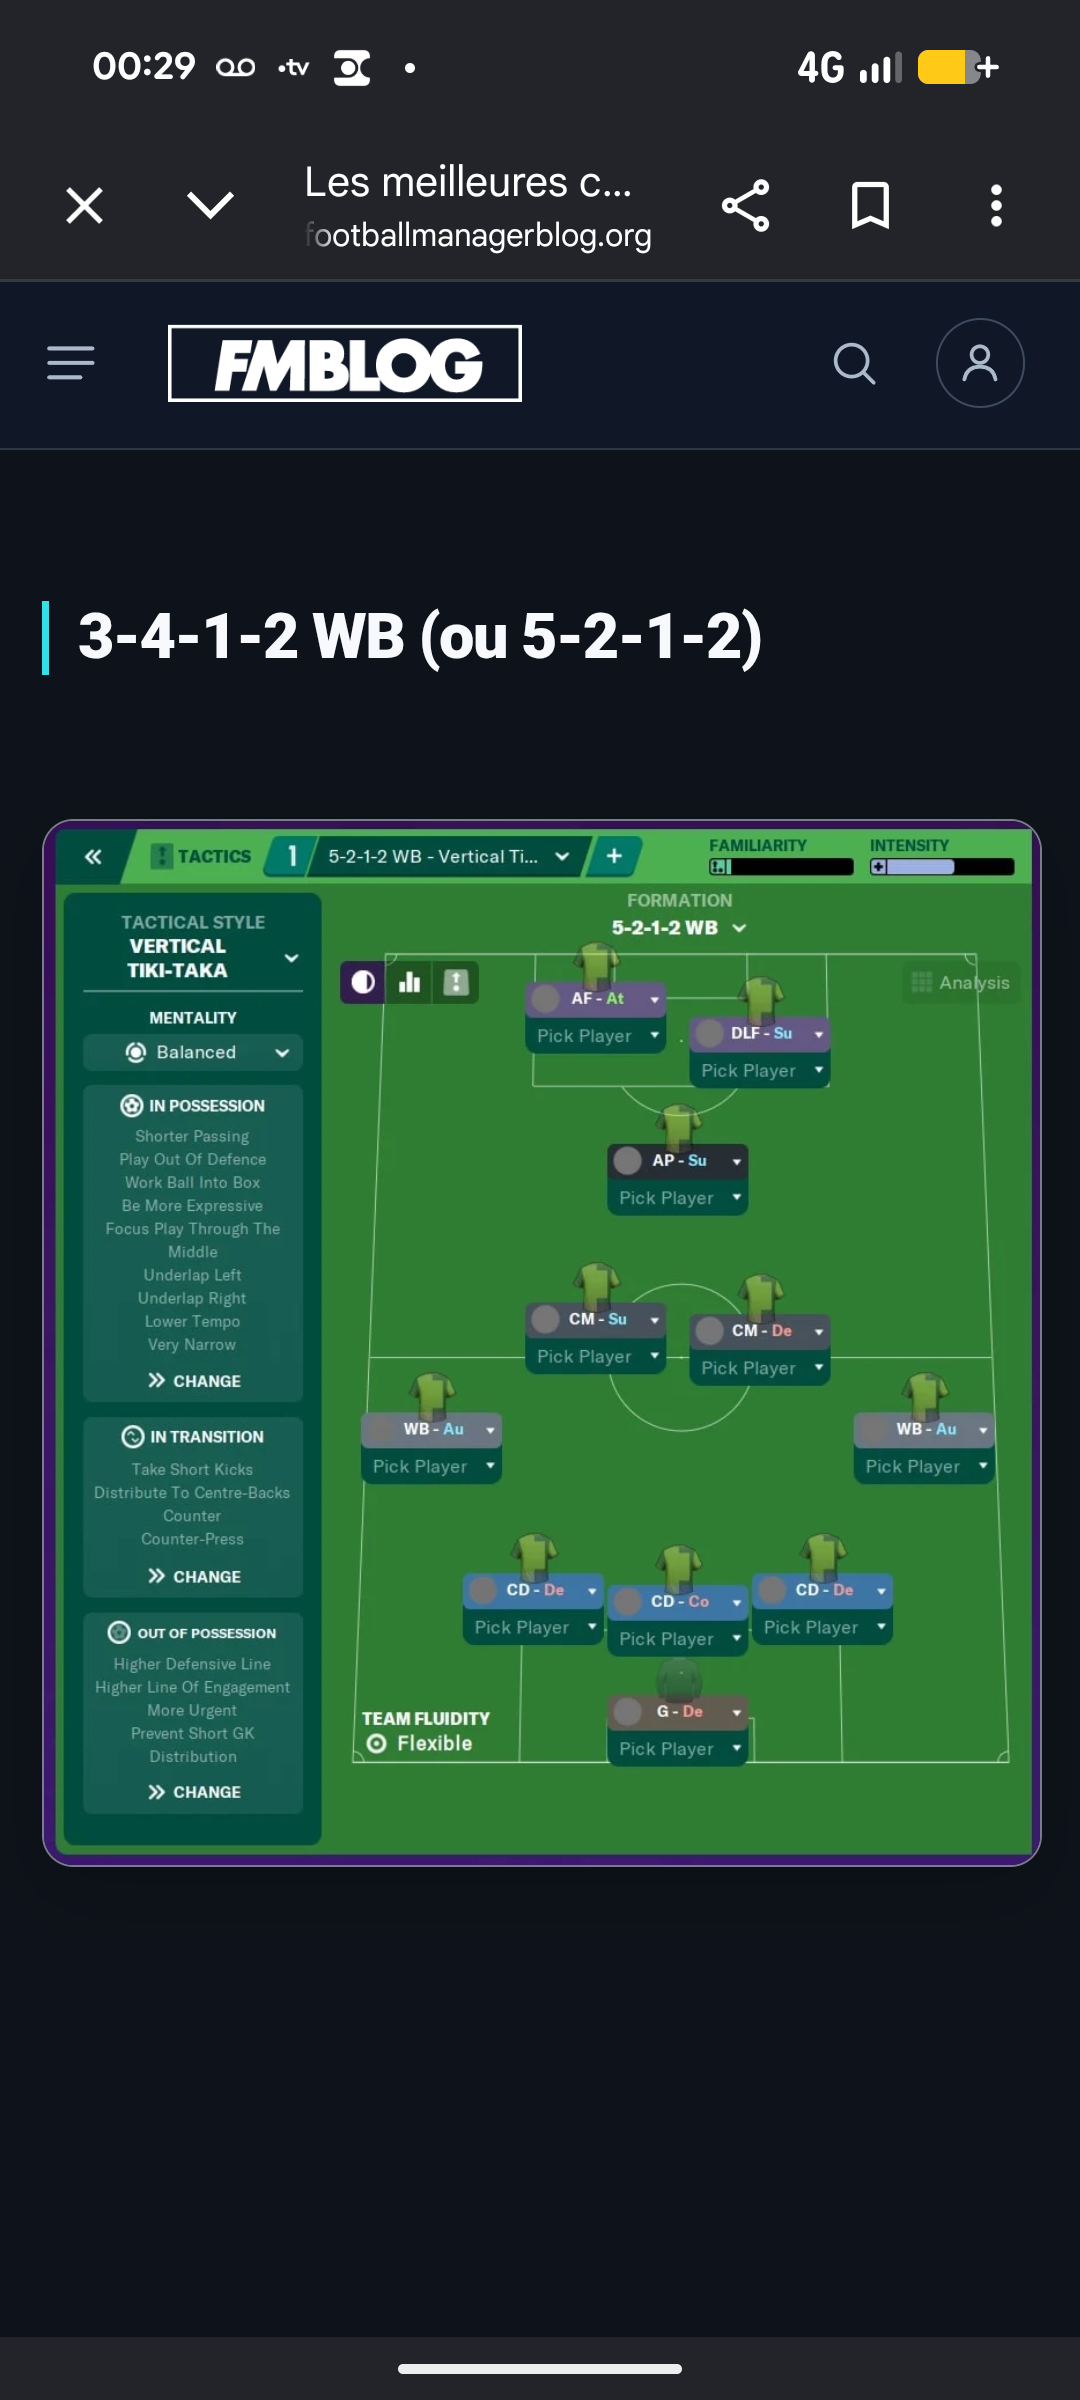
Guides for this tactic
The tactical theory behind the 4-3-3: roles, instructions, and the trade-offs that decide whether the system holds up.
Playing styles
Gegenpressing: A Full Guide
Klopp-style gegenpressing in FM, including squad profile, line-and-press pairing, sustainable workload, and the antipatterns to avoid.
Read guide
Playing styles
Tiki-Taka vs Positional Play
Why circulation density and zonal occupation aren't the same thing in FM, and the half-space occupation rule that decides build-up.
Read guide
Foundations
Defensive Transitions
The five seconds after losing the ball decide most matches. Counter-press, drop-and-recover, and how to know which one you should be doing.
Read guide